
Learn how to permanently remove your Facebook group using a mobile phone or PC.
A Facebook group is only as popular as its posts. If your group members aren't posting or engaging with content regularly, you might notice a dwindling member pool and a lack of new members.
While there are many ways to remedy these issues, starting from scratch is sometimes best. This might seem daunting at first, but it's surprisingly easy.
We'll walk you through how to delete your Facebook group in four steps. We'll also cover alternatives to deleting it and why Facebook might delete your group without permission.
Why you might want to delete your Facebook group
Facebook groups serve as hubs for shared interests, networking, and community building. However, there might come a time when deactivating or deleting your group becomes necessary.
The most common reasons for deleting a Facebook group include:
The group's focus has shifted.
The group is too burdensome to manage.
The group members are inactive.
The Facebook group is a duplicate.
There are growing privacy concerns.
The original values are no longer present.
You are no longer interested in the group's topic.
The group has become toxic.
Facebook's platform no longer supports your values.
Your group members are more active on another platform.
You want to disconnect from social media.
Aside from the above-listed reasons, repeated Community Standards violations from group members could put the group and your account at risk. For this reason, some people choose to close their Facebook group rather than ban violators.
Why your Facebook group was deleted without your permission
There are certain situations where Facebook will delete a group without your permission. Even before anyone reports a violation, Meta's artificial intelligence—which patrols Facebook and Instagram—spots 90% of vulgar or violent content and removes it.[1] This happens when a group doesn't follow the platform's Community Standards.[2][3]
For the greater good of the Facebook community, any Facebook group that amplifies or traffics hate is terminated immediately. If your page is removed for a tier violation under Facebook's Community Standards—and you feel it's in error—contact Facebook right away to appeal. However, in most cases, Facebook will reach out when something goes against their Community Standards and allow you to fix it.[4] This is called a warning.
If there are multiple or major violations after the first warning or restriction, Facebook will disable your account.
How to delete your Facebook group if you're the admin
Before closing your group, make an announcement to the members. Let them know you've enjoyed their participation in the group and the closure has nothing to do with them. If you wish to provide a reason for closing the group, do so in this post.
If not, announce the closure and give them seven to 10 days to save their posts and attachments. Afterward, follow the following steps to close your group.
How to delete a Facebook group on desktop
Make sure you're logged into your Facebook profile on a laptop or PC, then follow these four steps to delete your group.
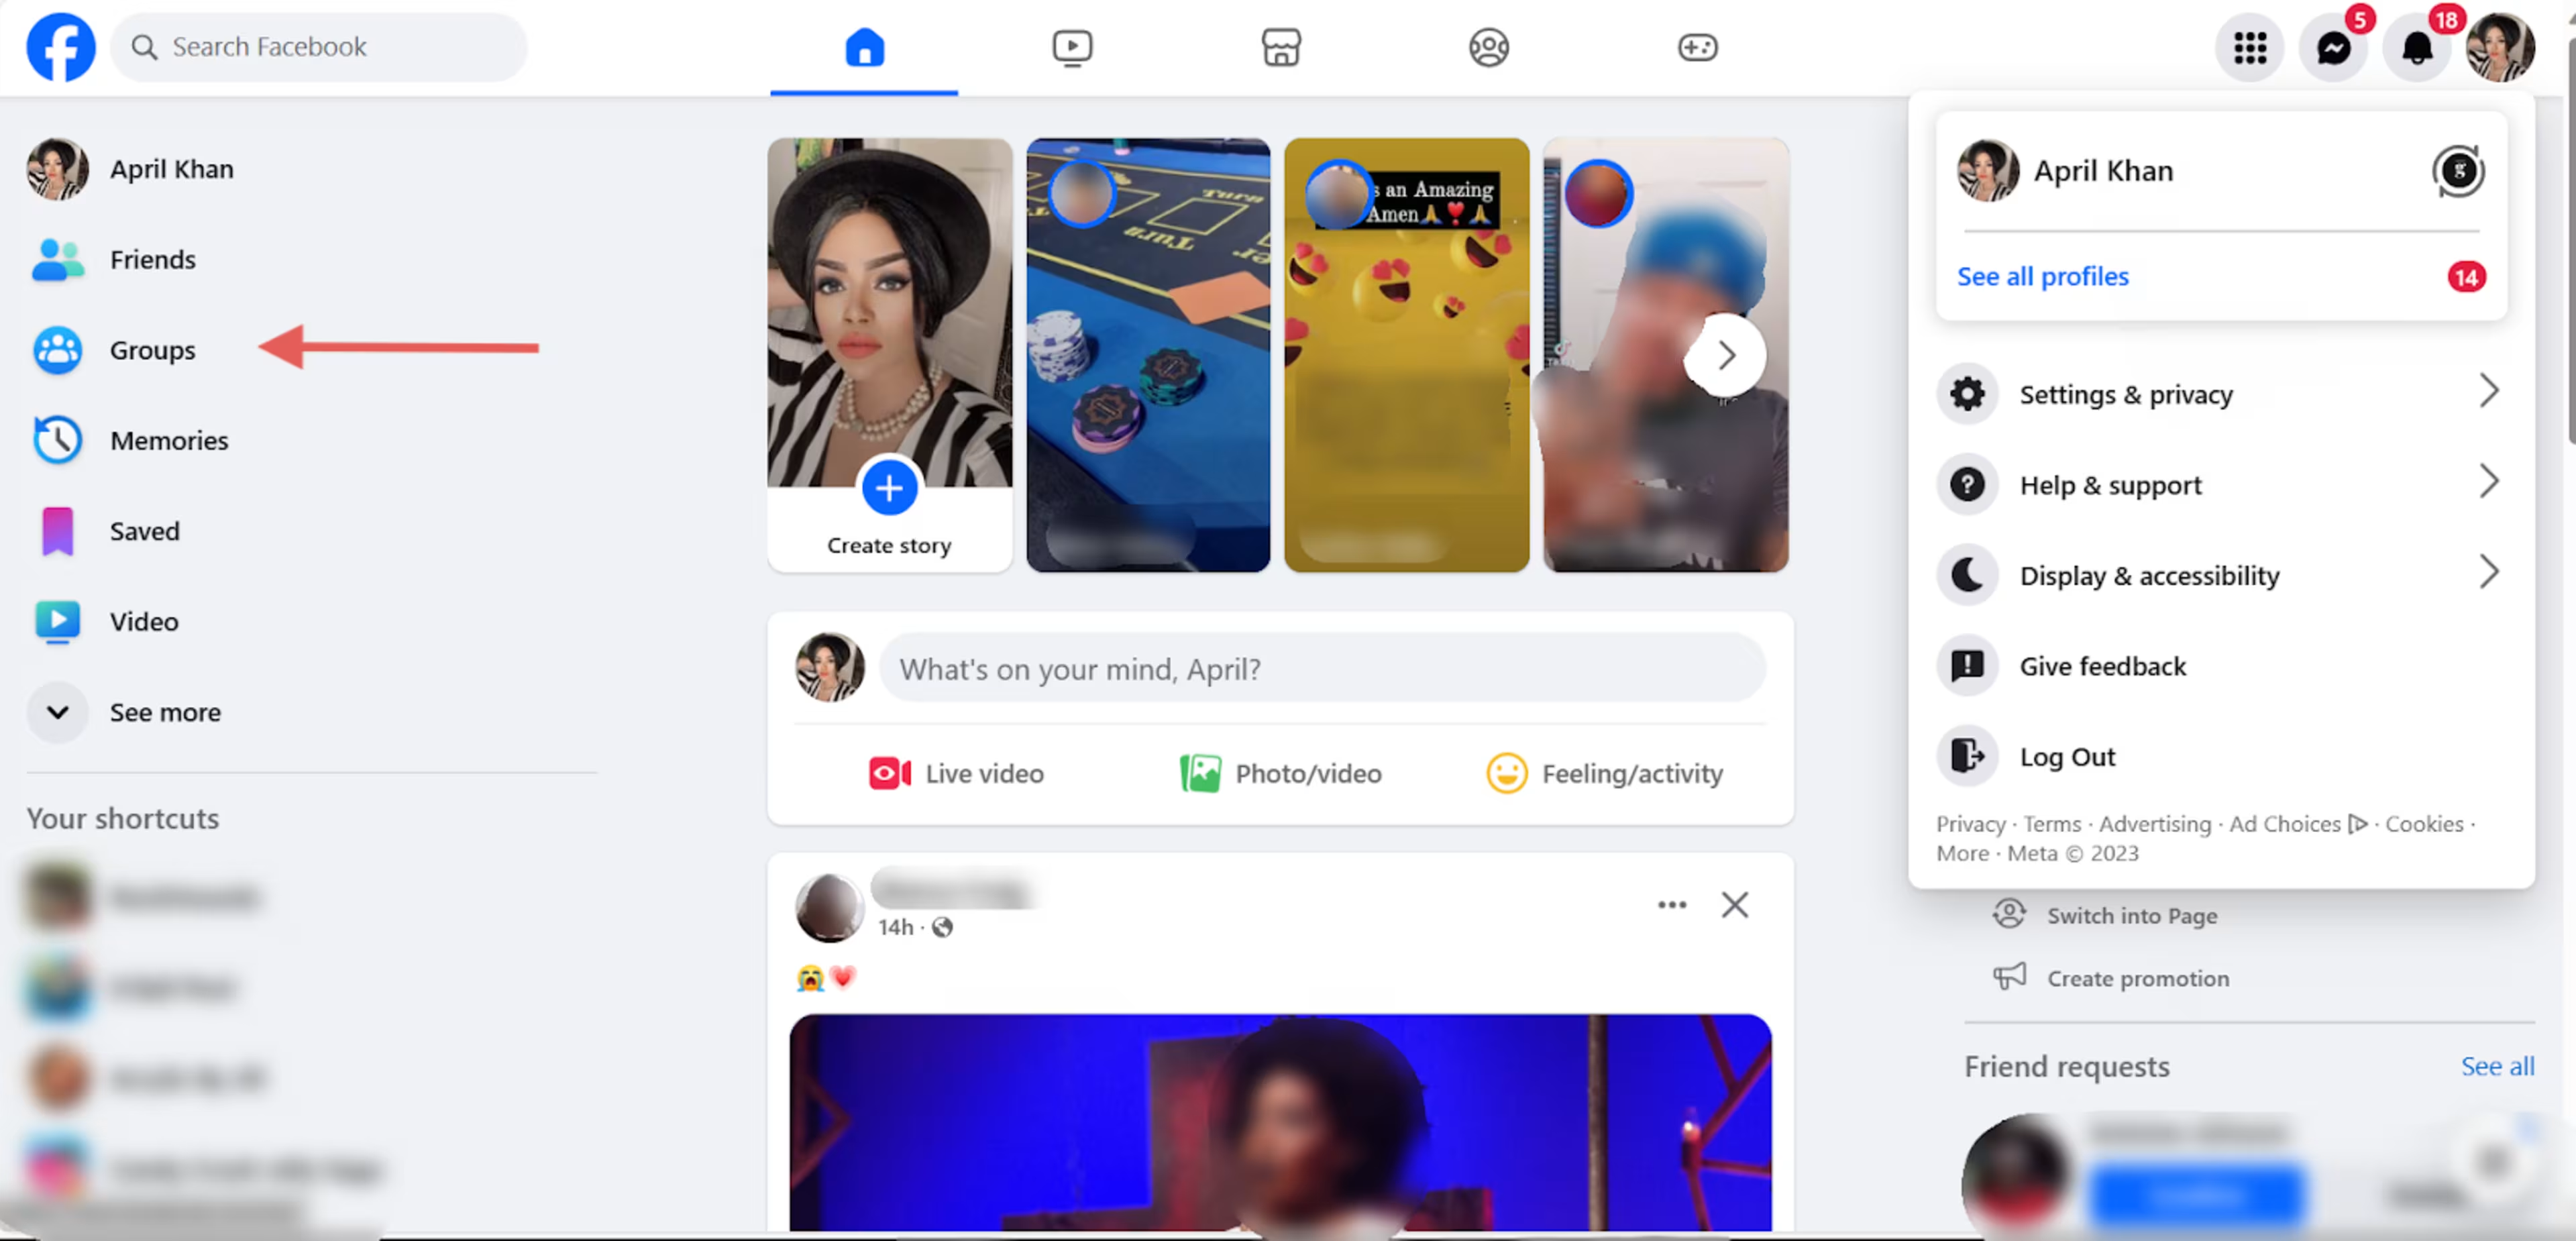
1. Sign in to your Facebook profile, then click "Groups" from the left menu.
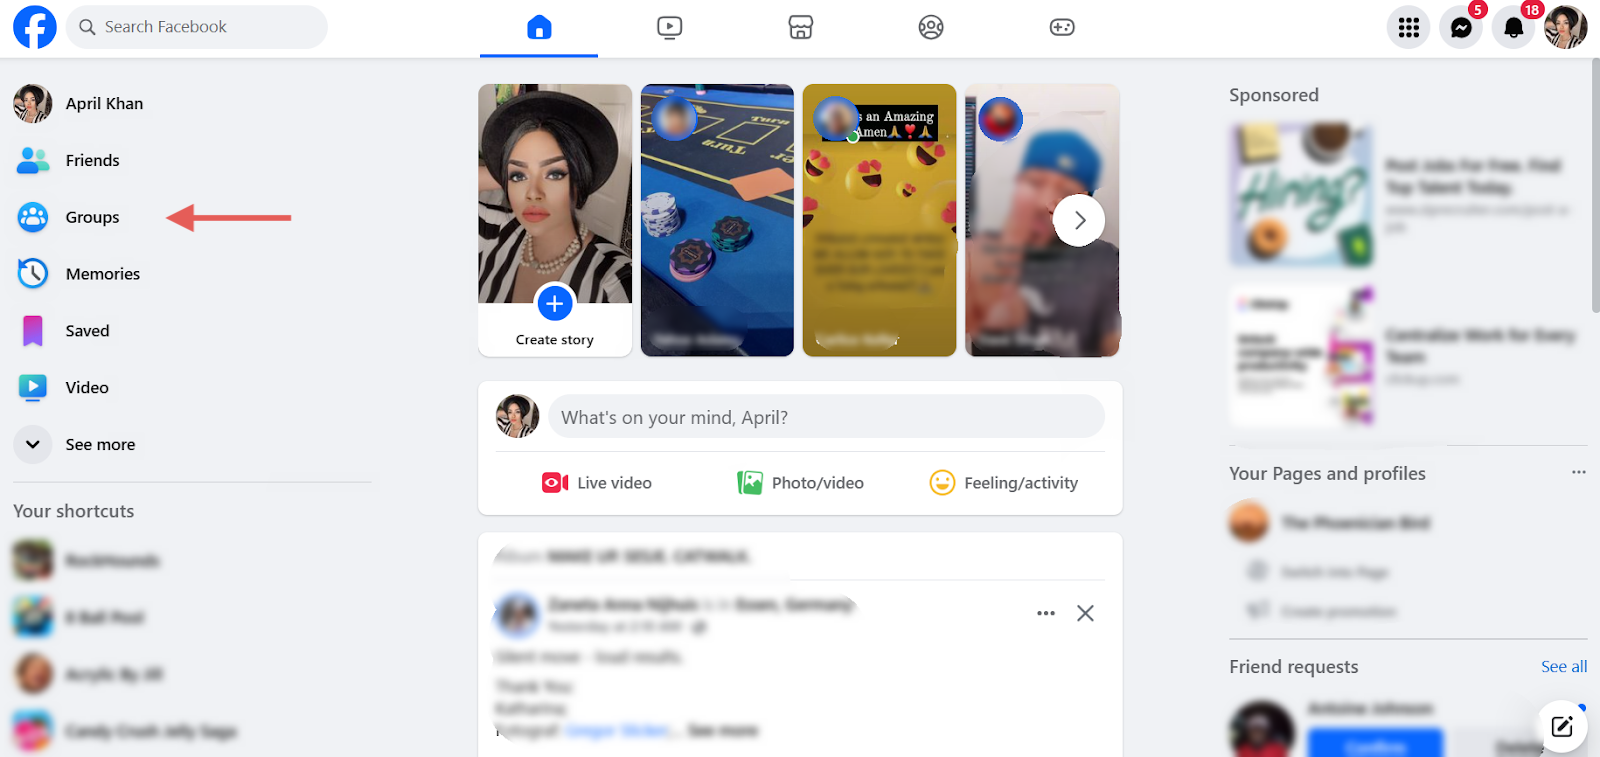
All screenshots provided by the author.
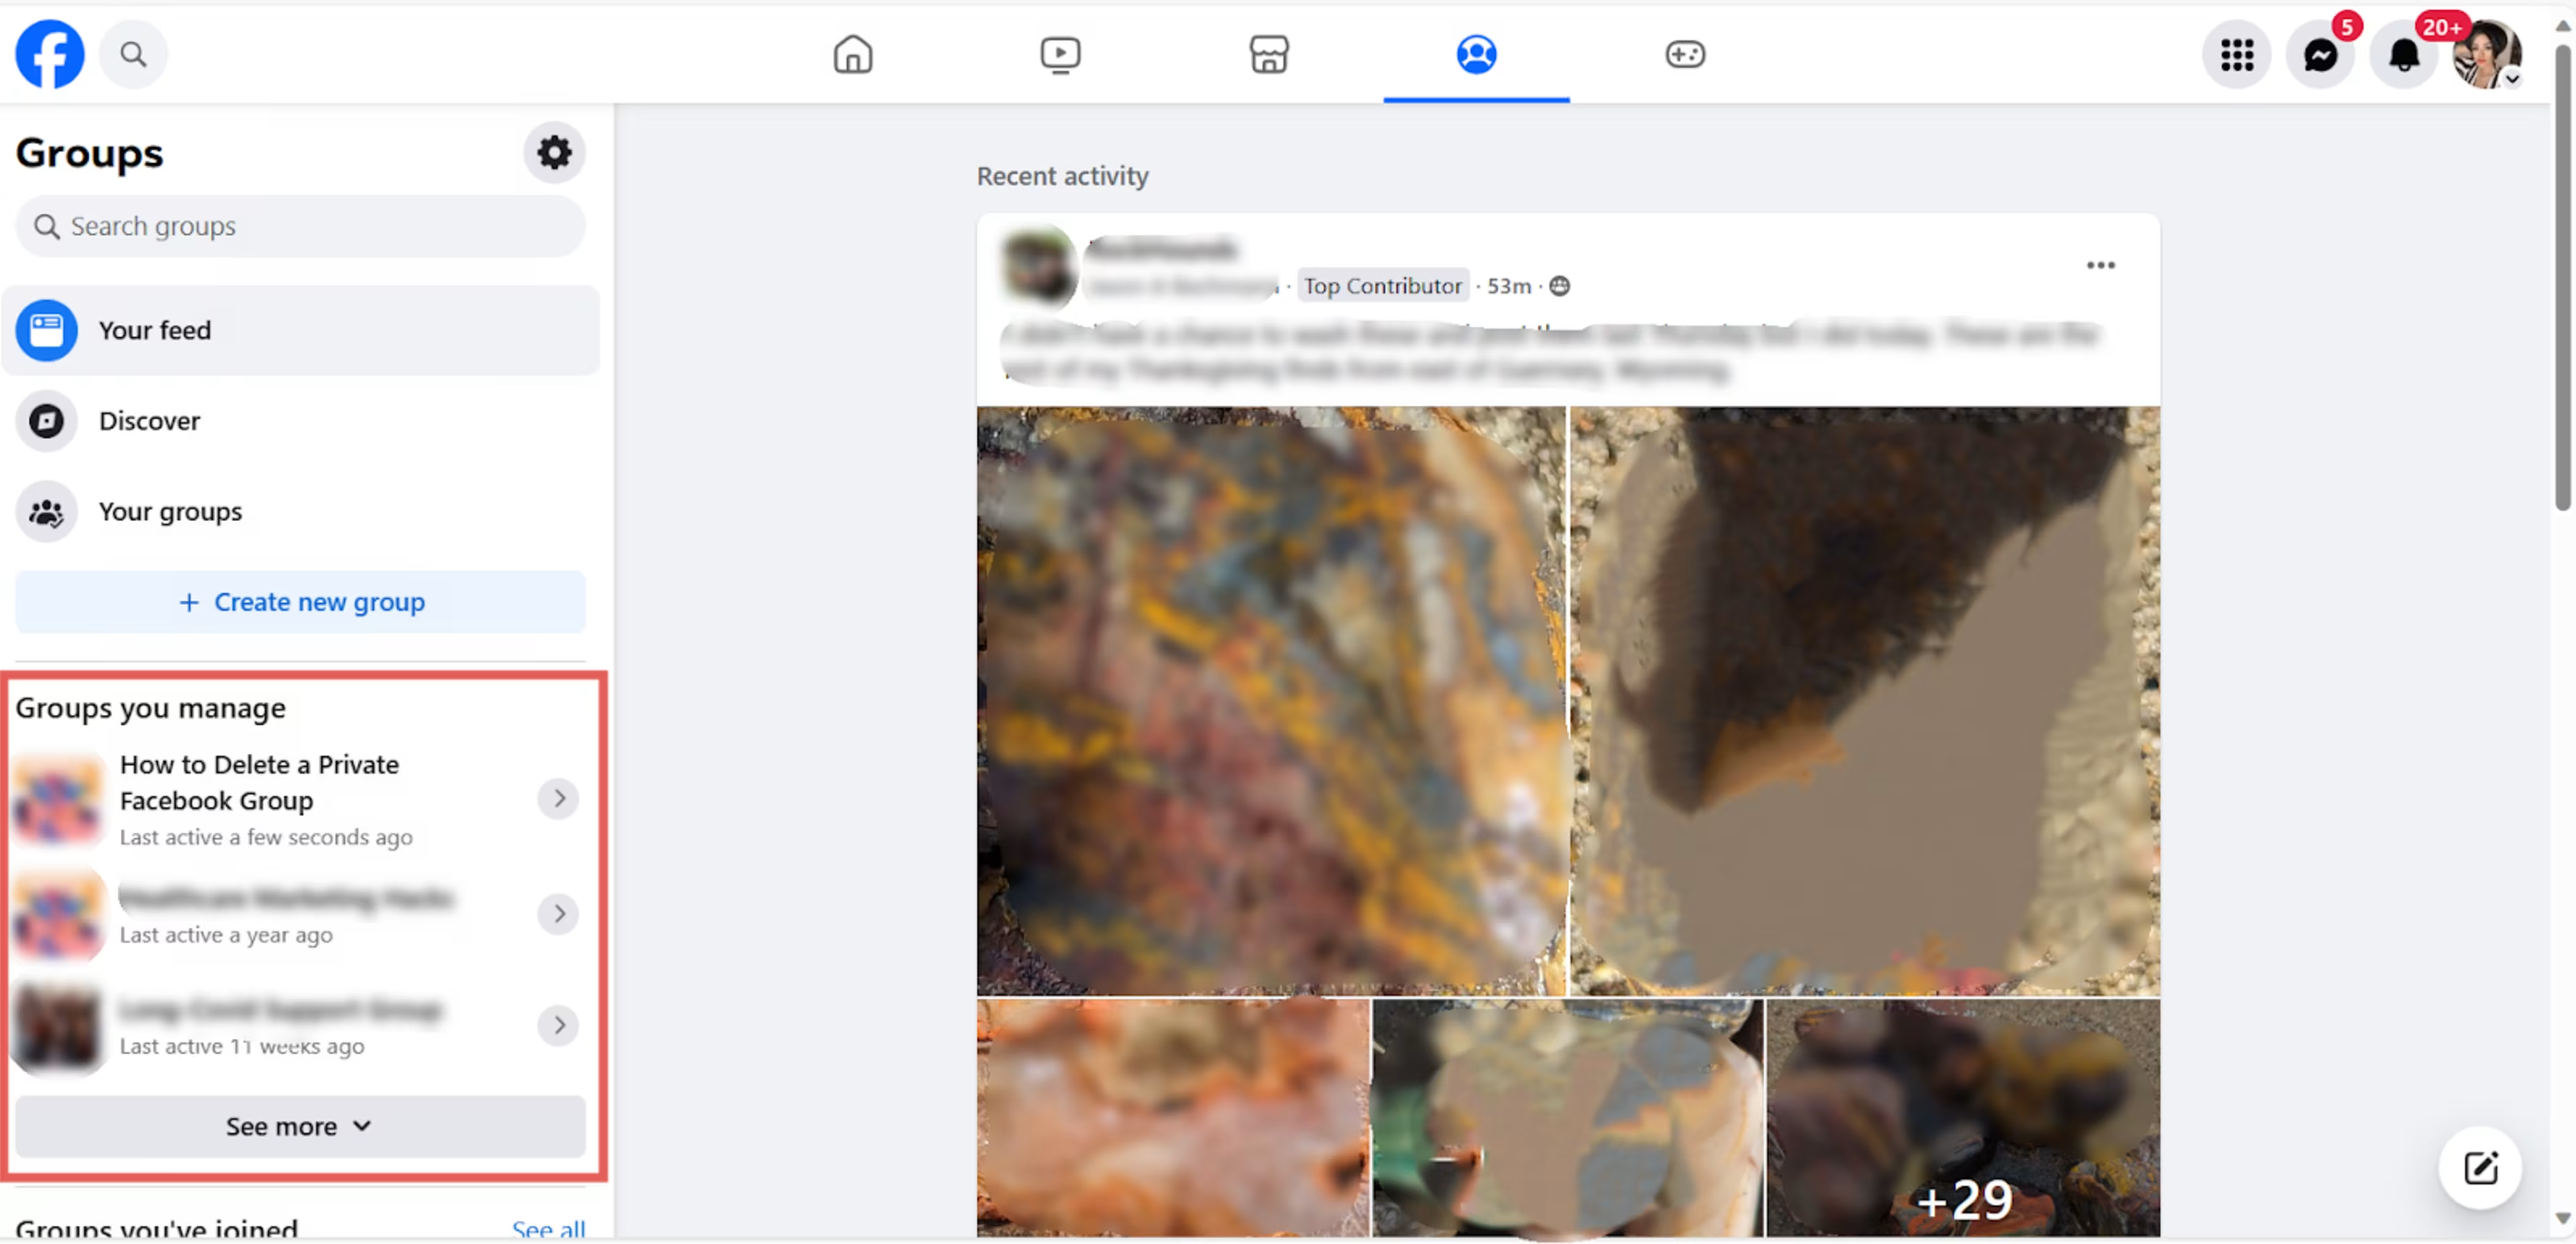
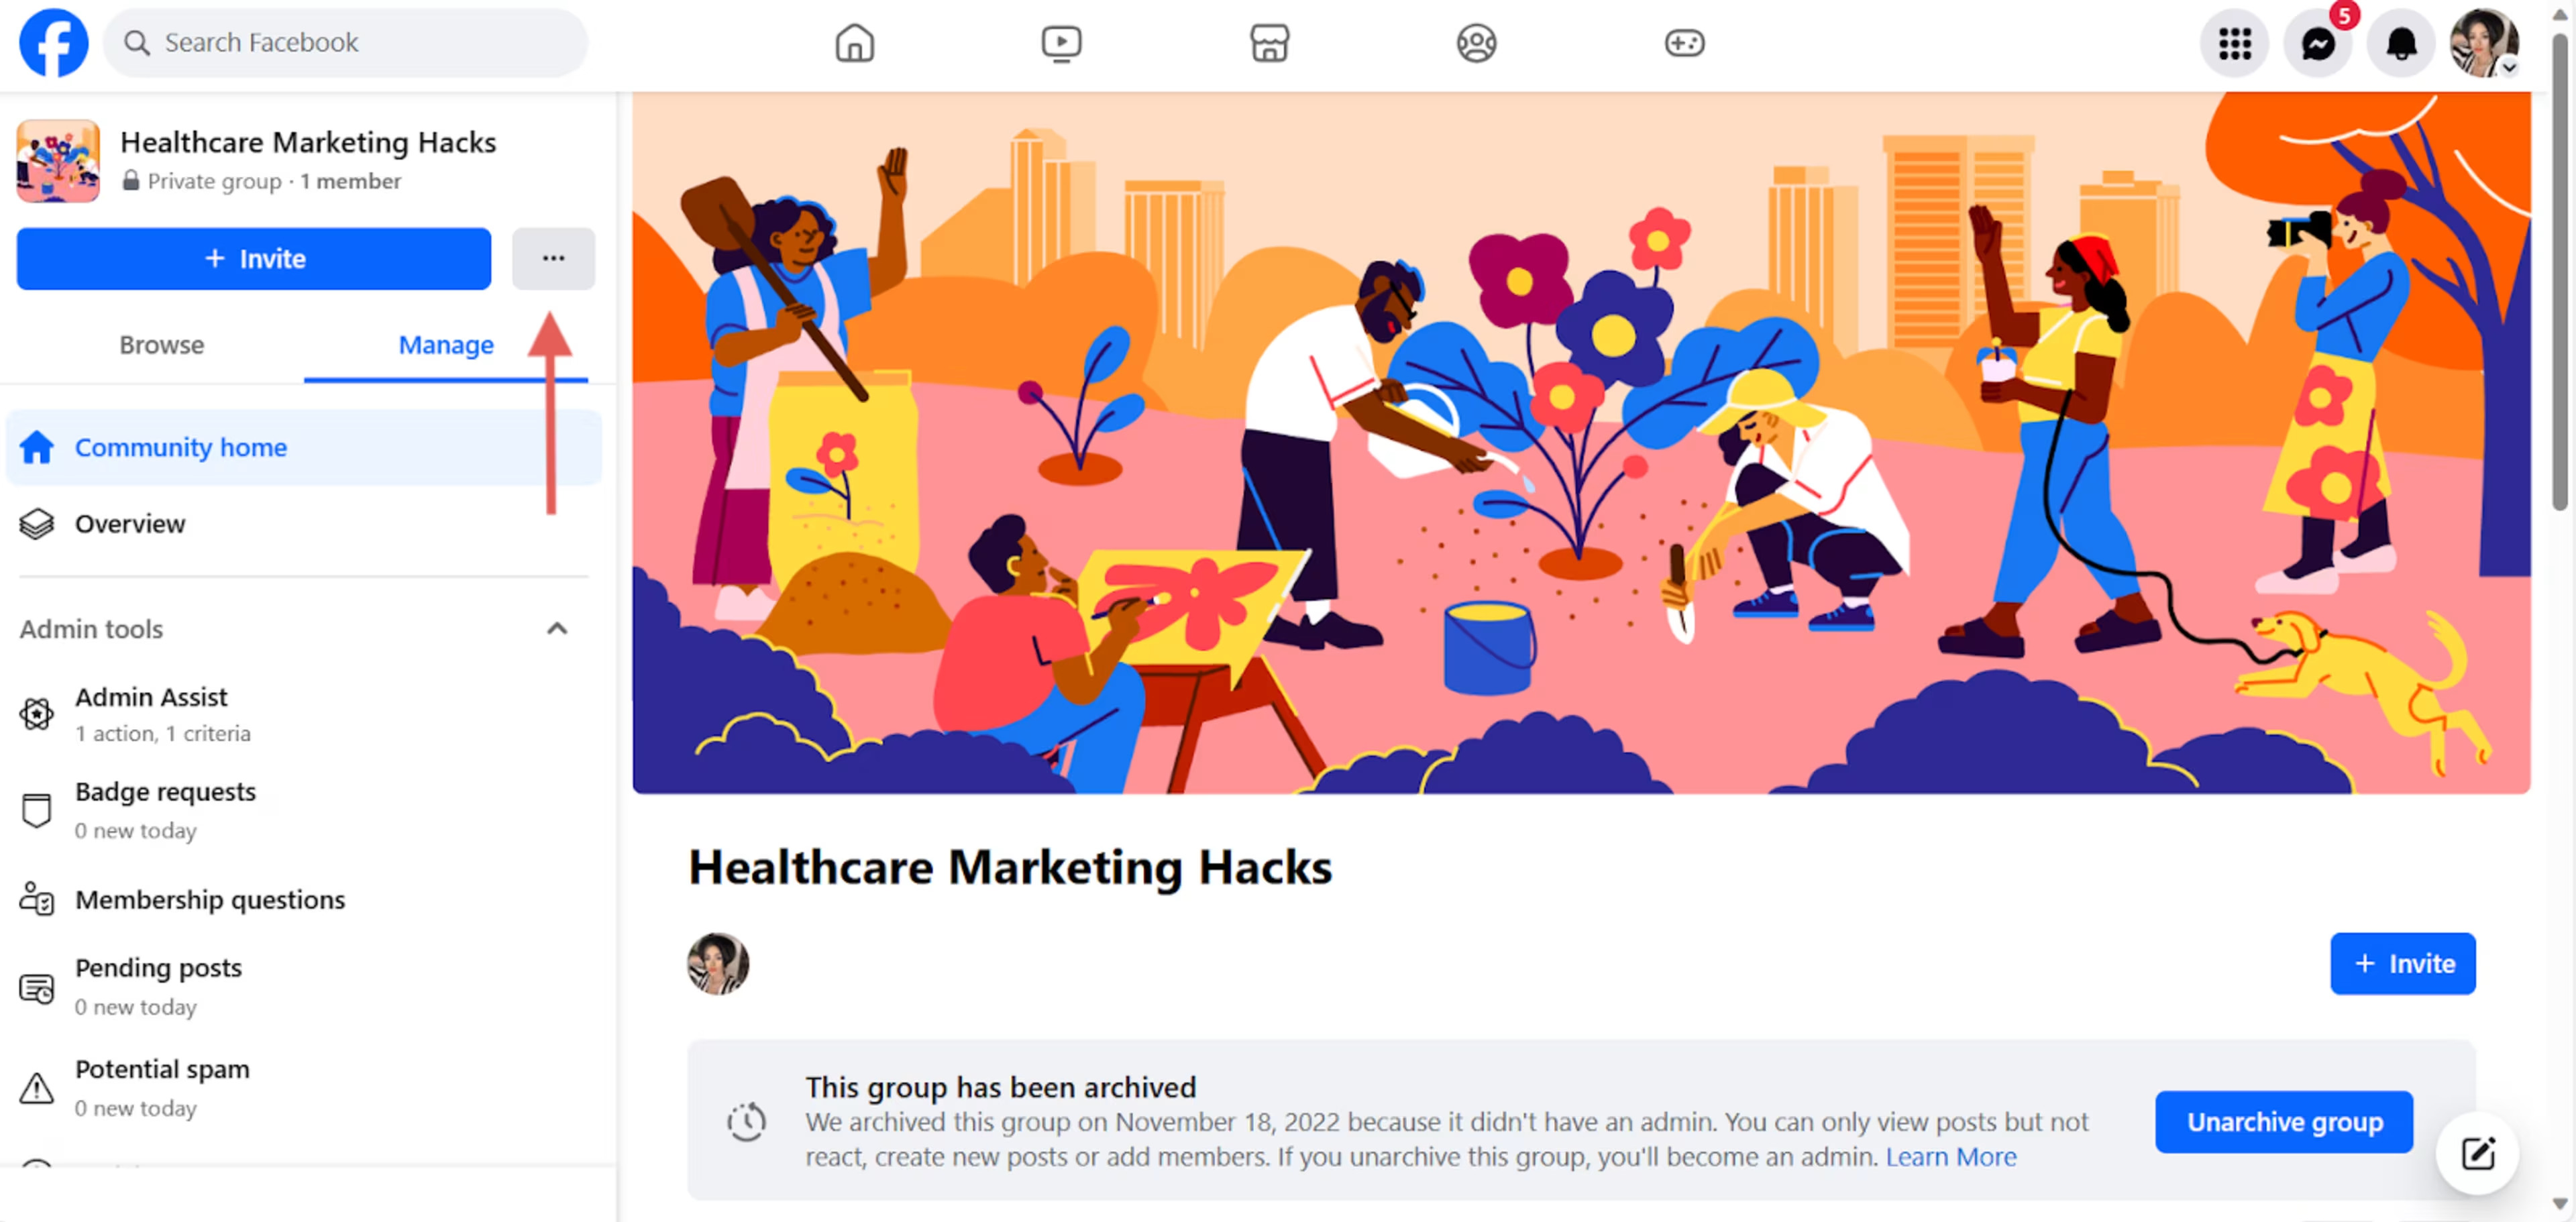
2. Go to "Groups you manage," and select the group.
3. Next to the “Invite” button on the left, and click the three dots to open the dropdown menu. Then click "Delete group."

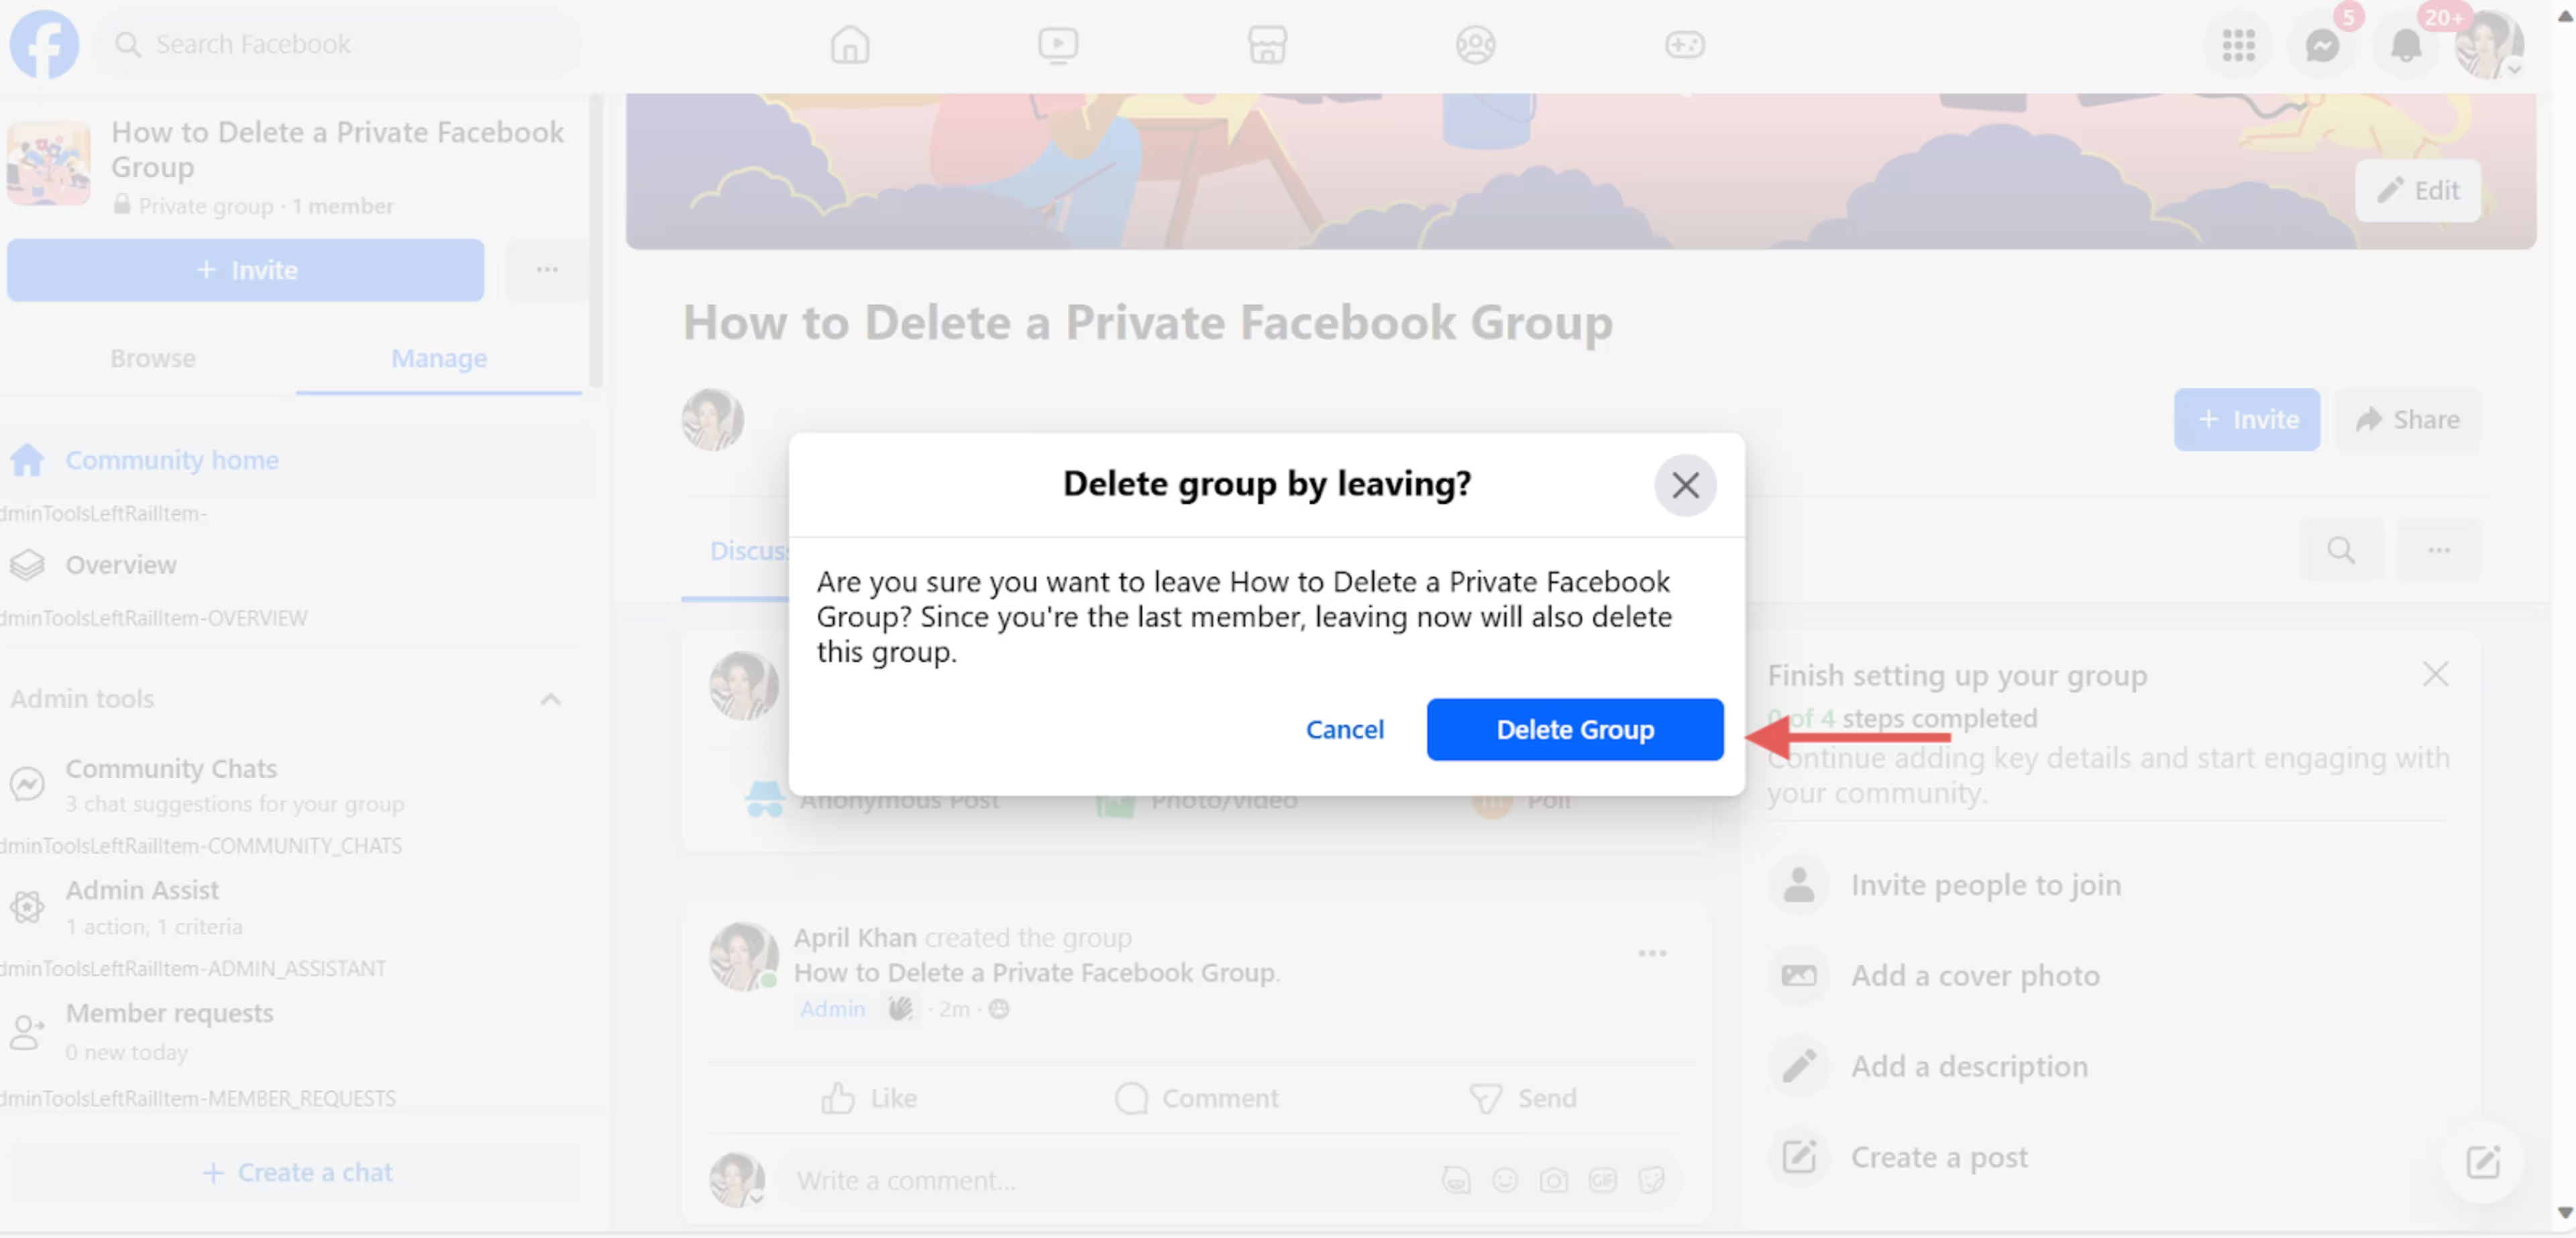
Step 4: In the pop-up, click "Delete Group."
How to delete a private or public Facebook group
Whether your group is public or private, closing it removes it from Facebook's search immediately. Once you delete it, all pending member requests and previous connections are also deleted. If you plan to create a new group after deleting the old one, send a message to pending members to let them know. Afterward, follow the above-listed steps to delete your public or private Facebook group permanently.
How to delete a Facebook group on mobile
You might have created your Facebook group on a PC, but you don't need a PC to delete it. All you need is access to the internet and the Facebook app.
1. Tap the "Menu" icon on the bottom right corner of the screen.

2. Tap "Groups," and select "Your Groups."

3. Find the group you want to delete, and tap on it.

4. Tap the shield icon located at the top right.

5. Scroll down to the bottom, and tap "Delete Group." Then tap "Delete Group" on the pop-up to finalize it.

How to delete your Facebook group if you're a member
If you are the admin of a Facebook group, you can approve or restrict participation in it. You can also modify, deactivate, or delete the group entirely. Members and moderators cannot close Facebook groups. To do so, they'd have to become an admin.
A Facebook group member only has the right to react to or create posts—assuming the admin permits these actions.
How to back up your Facebook group data before deleting it
Facebook allows users to save a copy of their data to a computer. Unfortunately, this option is not extended to Facebook group administrators or Facebook page creators. Therefore, once you close your group, you will lose any data.
If you might want to access your group's data at a later date, it's best to archive the group instead of deleting it. Deleting groups on Facebook is permanent and cannot be undone.
How to archive a Facebook group
Archiving a Facebook group means putting it on hold, or what Facebook calls "pause".[5] Pausing a group allows you to freeze its activity without deleting it. Once paused, members won't be able to post or comment on anything—this includes admins.
Once you pause your group, Facebook will place a message at the top of the page to let everyone know that activity on this page is paused.
If you're ready to archive your Facebook group, follow these seven steps:
1. On the homepage, click "Groups."
2. Click the group you wish to archive.
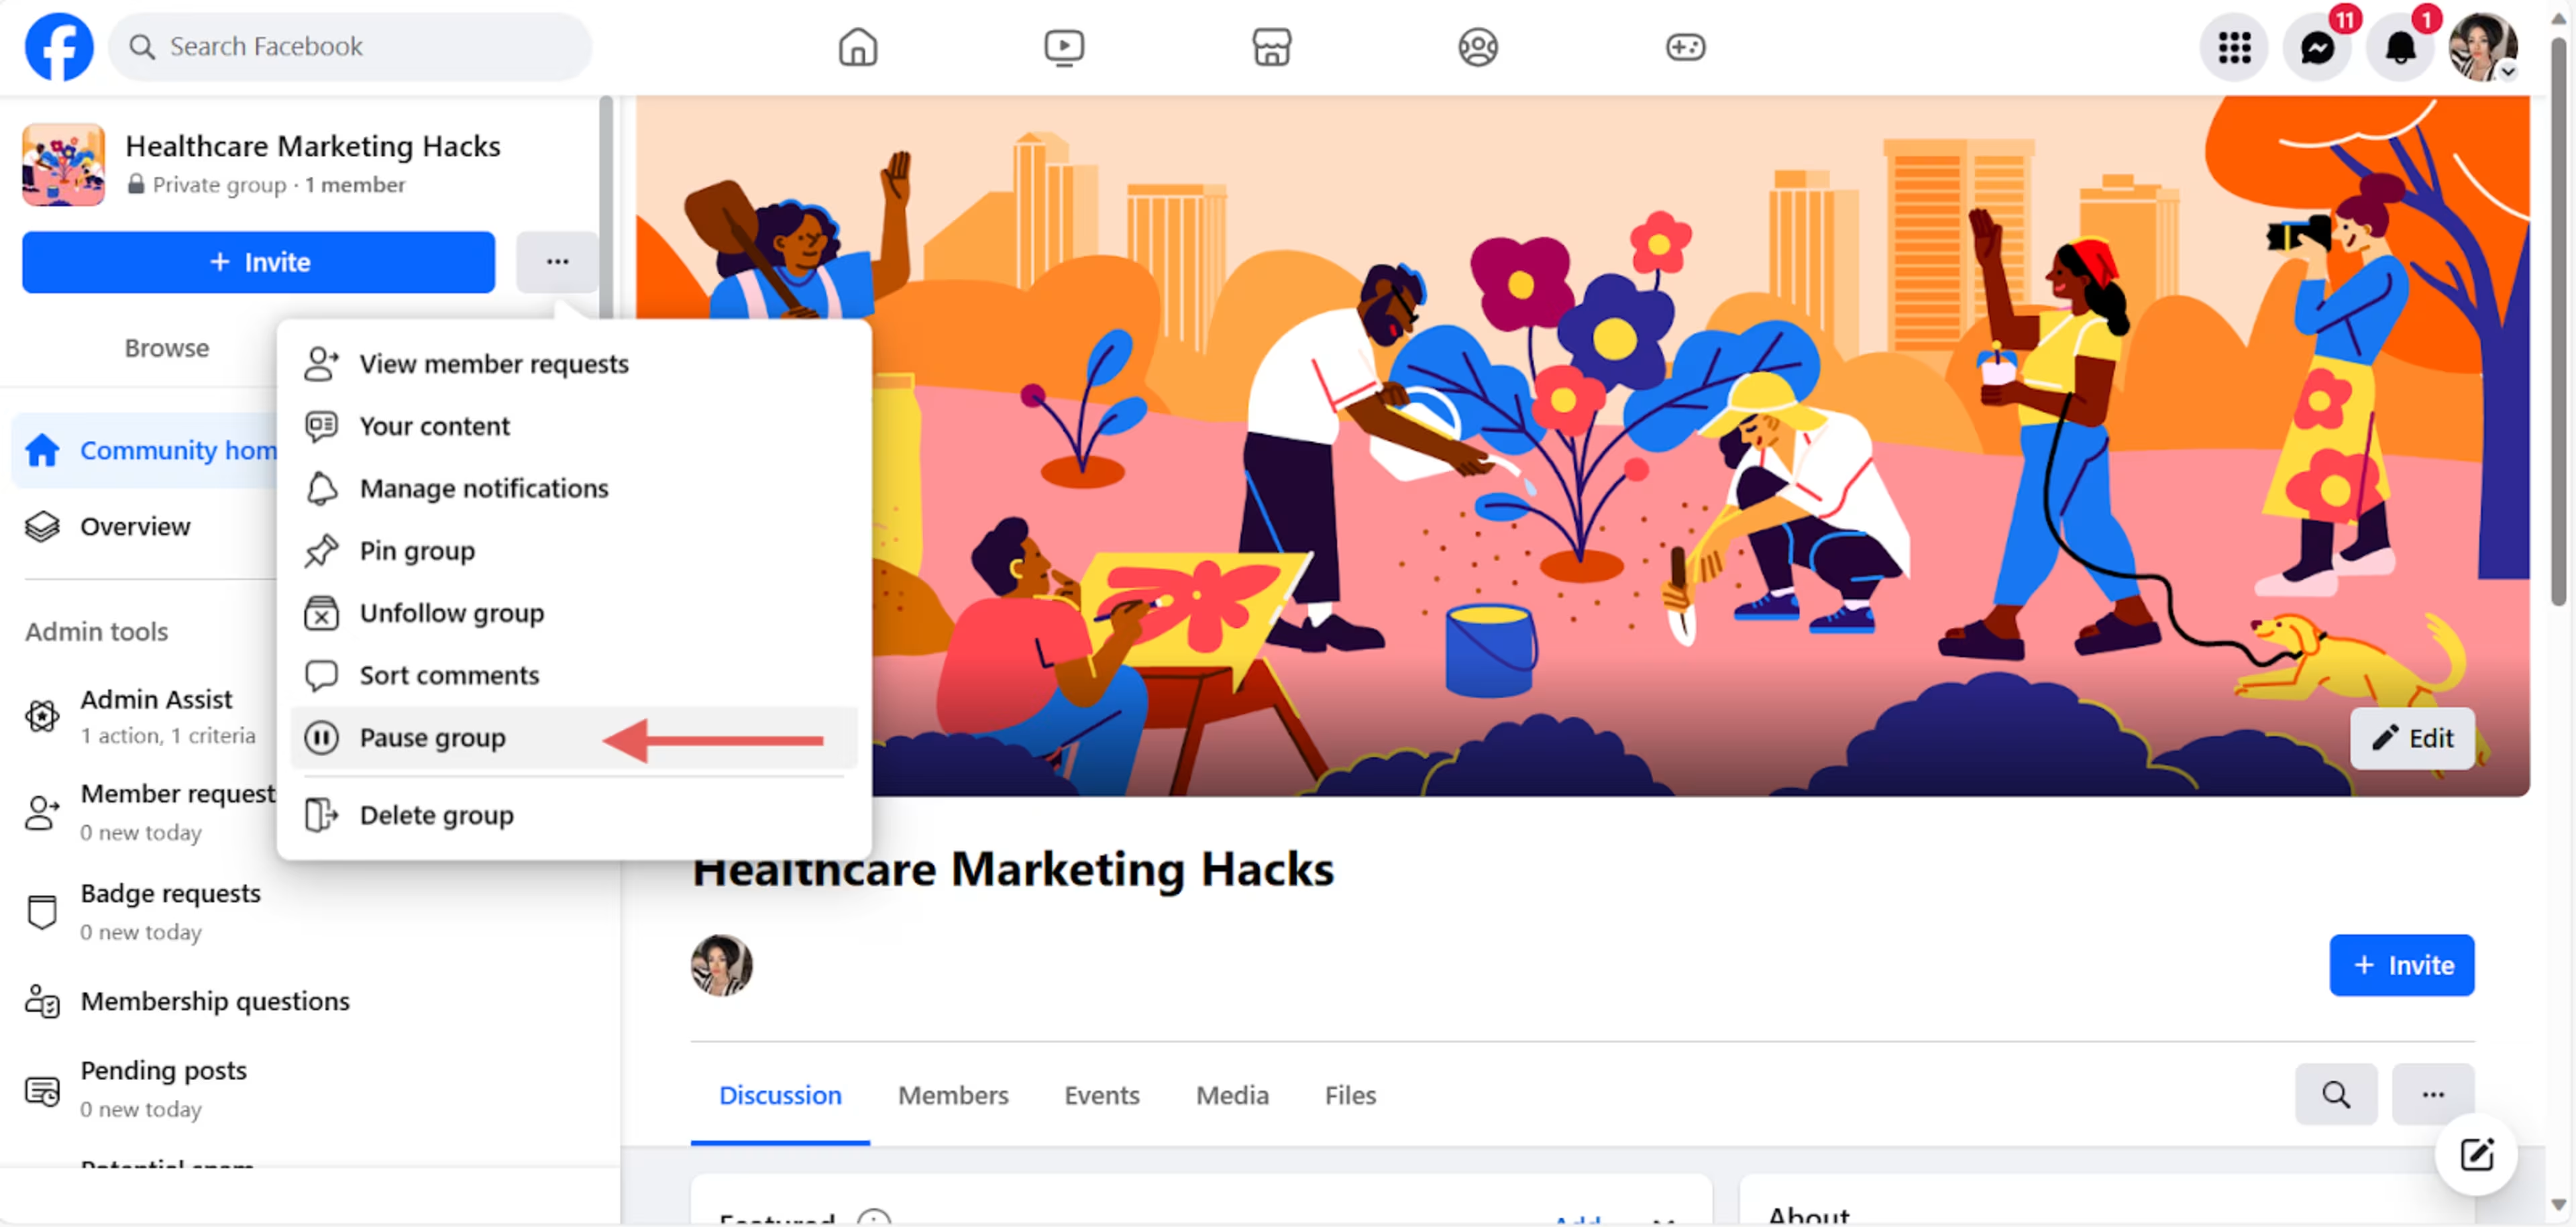
3. On the left, click the three dots next to "Invite."
4. Click "Pause group."
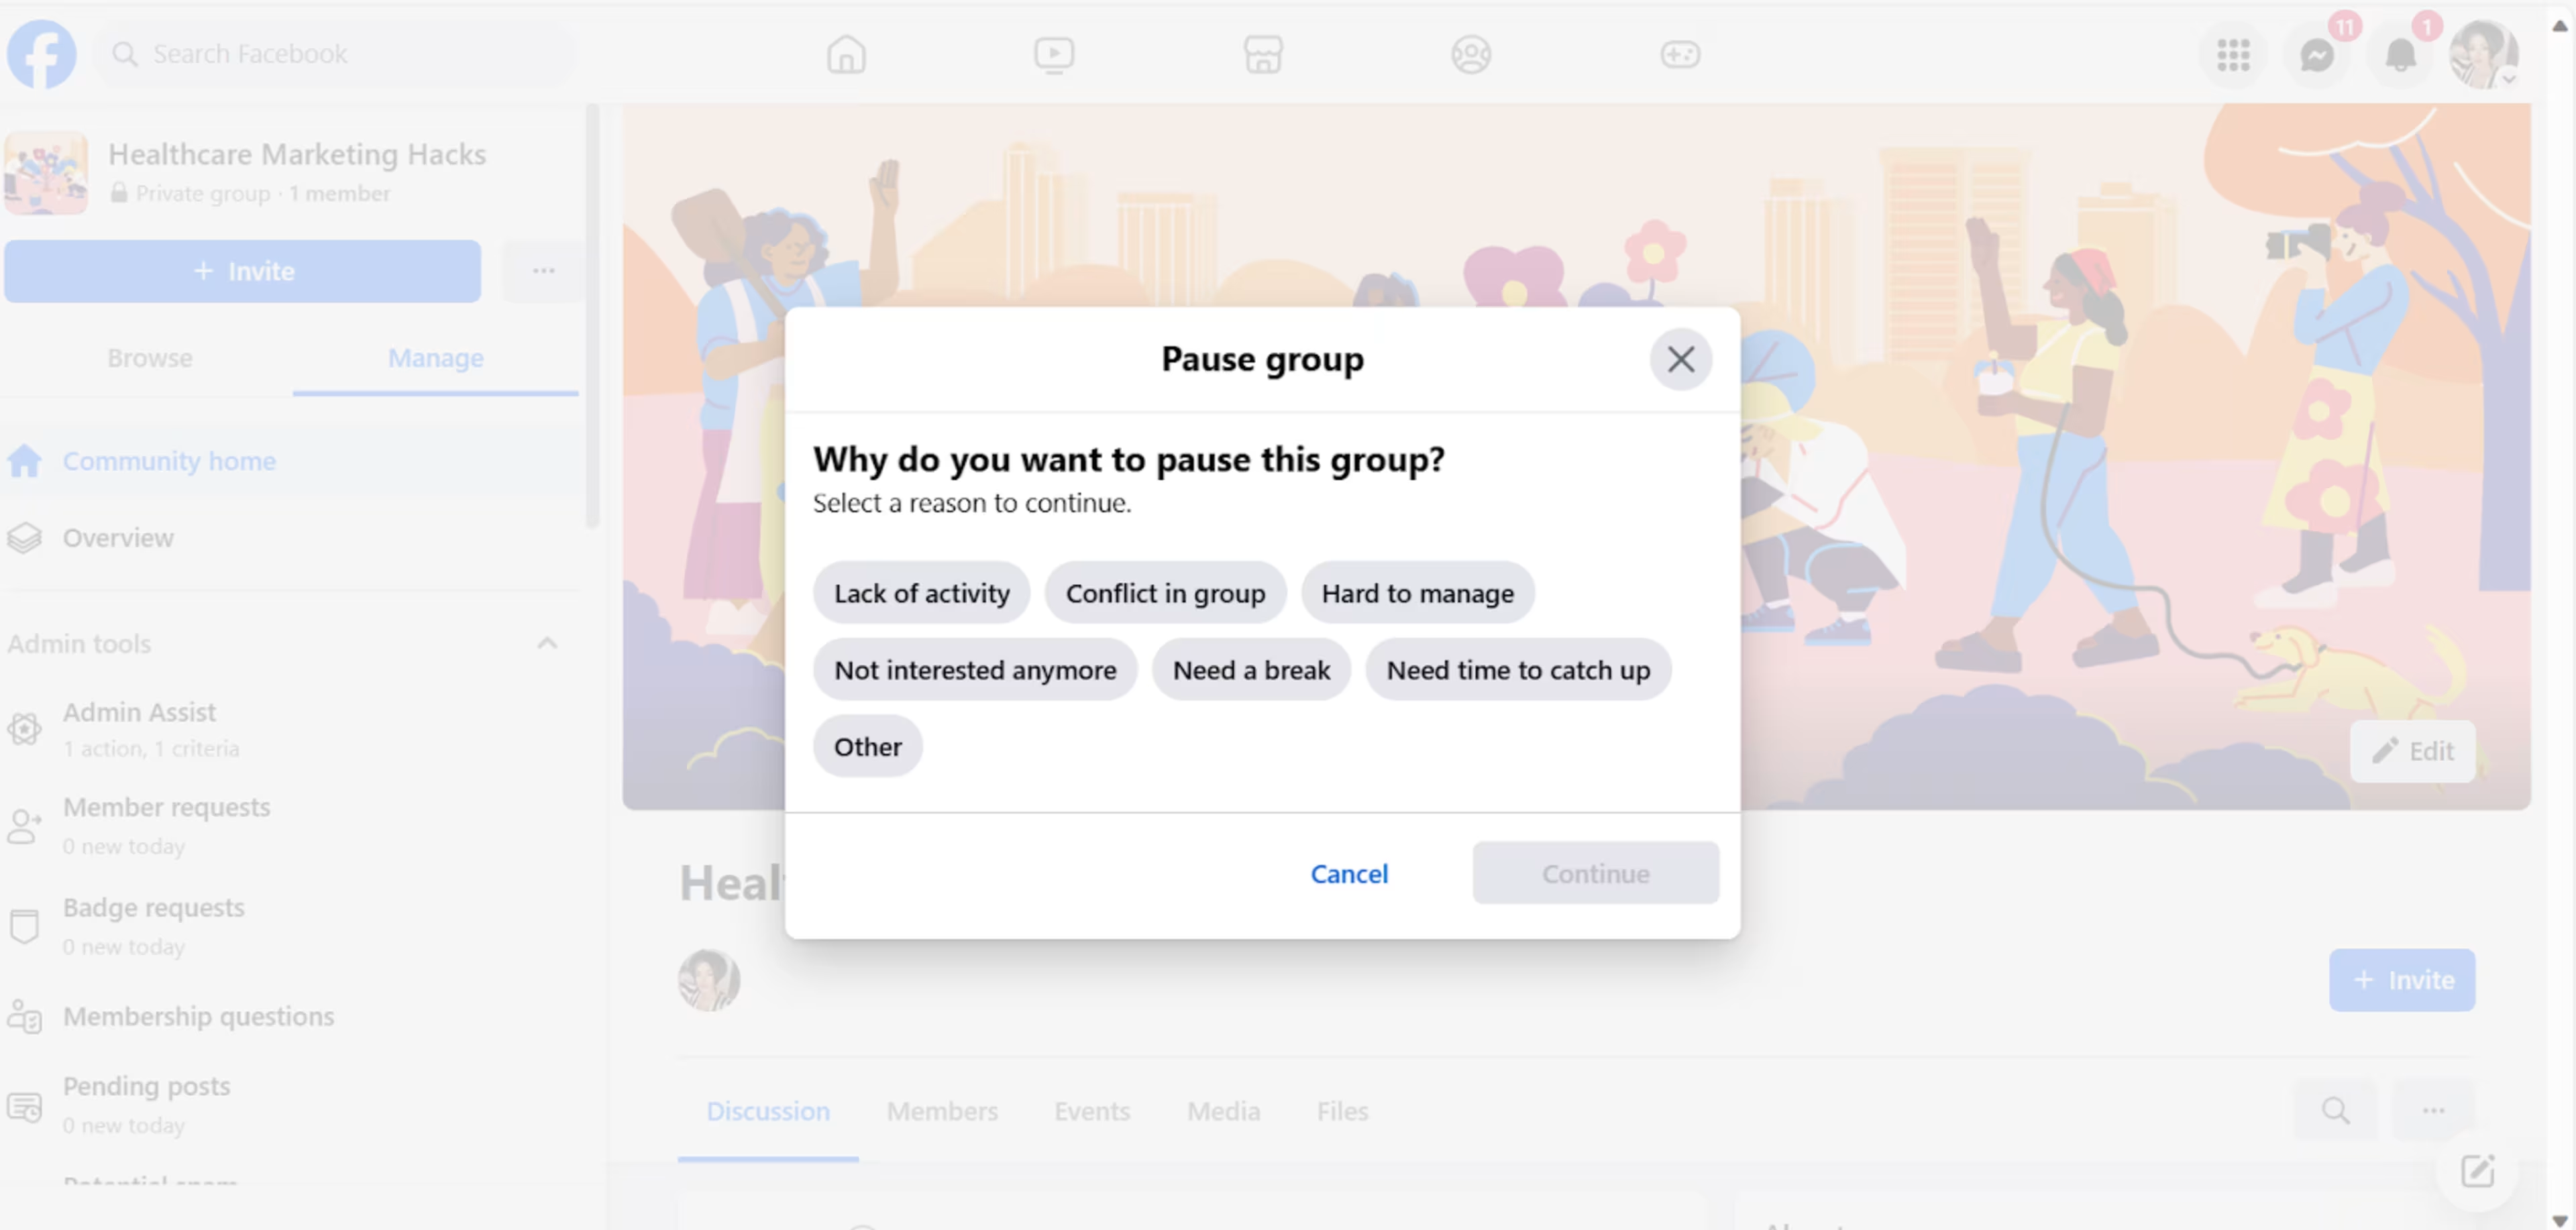
5. Select the reason for pausing your group. Then click "Continue."
6. Write an announcement to the group letting them know why you're pausing it. Then, select a date to resume activity.
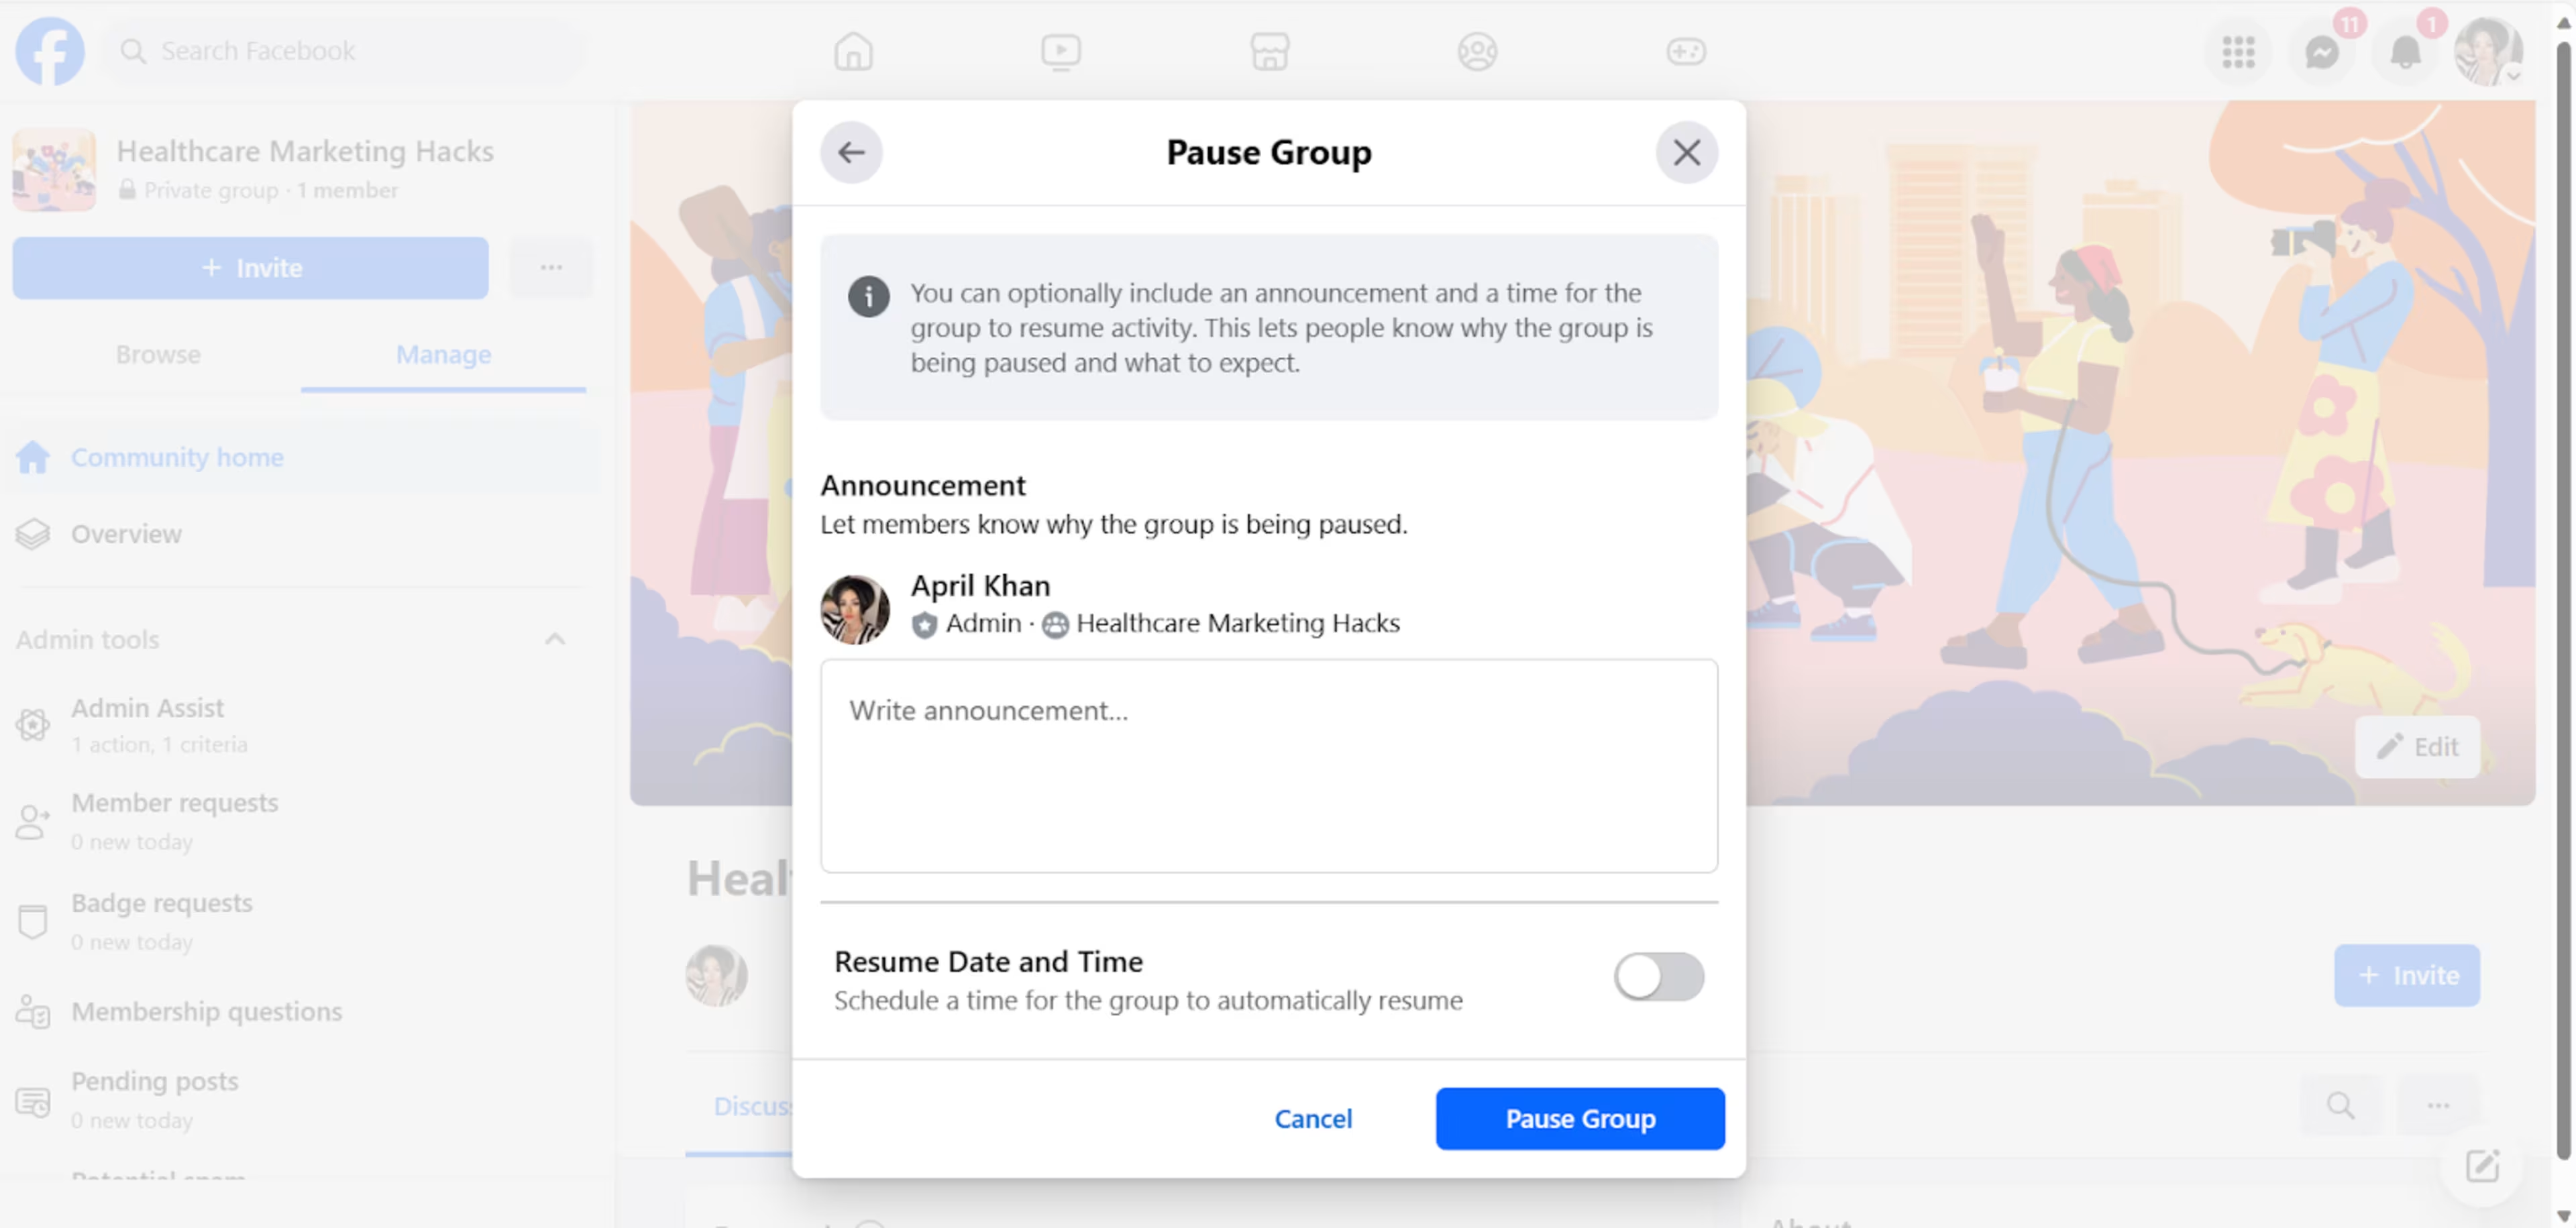
7. Click "Pause Group."
Alternatives to deleting your Facebook group
The main alternative to deleting your Facebook Group is to archive it. Archiving your Facebook Group allows you to continue your administrative tasks or take a break with the option to resume activities later.
Another option is to pass the administrative tasks to a trusted member. You can extend duties to a moderator or close friend while retaining administrative rights. Remember that once you appoint someone as an admin, they can remove your administrative rights.
Other options include:
Using a social media scheduler to post at set times.
Hiring a social media manager to research, write, and post content to your group.
Creating a secondary Facebook group to post off-topic content.
Creating another Facebook group
If your Facebook group covers a broad topic, such as gardening or muscle cars, consider dividing your posts into multiple groups.
A gardening group, for instance, will post topics ranging from rose beds to fencing. Members who aren't interested in rose beds will not interact with posts about that topic and may leave the group. By dividing these interests into multiple groups, you'll boost engagement and retain your members.
To open a new Facebook group:
Click "Groups" from the homepage.
Click "Create a new group."
Type the name in "Group name."
Choose "Private" or "Public" for the group's privacy.
Choose friends to invite, then click "Create."
Transferring administrative duties to a trusted moderator
Sometimes, life gets a little busy, and you might not have as much free time as before. Instead of closing your group or leaving it to run itself, choose someone you trust to moderate and manage the page.
Begin by discussing your expectations with the moderators. Ensure that they have a good understanding of what's expected of them. This includes conflict resolution, posting times and frequency, and subject matter. If they're willing to accept the role, it's time to appoint them as admins—here's how.
Go to "Groups" from your Facebook homepage.
Select the group from the side menu.
Click "Members" from the tabs located under the cover photo.
Scroll down to locate the member.
Click the three dots to the right of their name. Select "Invite as admin."
Click "Send invite."
Posting automatically with a social media scheduler
The easiest way to run your Facebook group without being overly involved is to use a third-party social media scheduler, also called a content planner. This tool assists you in planning, scheduling, and posting content to your Facebook group.
You choose the frequency, posting times, and content. Some social media schedulers also provide recommendations such as hot topics (based on keywords you plugged in) and optimal posting times. If you wish to interact with comments on these posts, you can do so within the same tool.
Are you sure you want to delete your Facebook group?
Running a Facebook group is both challenging and rewarding. You should post interesting and shareable content regularly to grow your group. You must also engage with your members.
The time it takes to fulfill these responsibilities could interfere with other daily tasks. Consider a social media scheduler to avoid closing your group or trusting it to a moderator.
If you’d like to take a look at software options that can streamline your Facebook group management, check out these resources: