

Facebook’s streaming feature, Facebook Live, allows users to stream live content on personal or business pages. This lets users share content in real time and interact with other users who can comment on the video as it broadcasts.
How to set up Facebook Live
Note: This guide covers how to create videos using Facebook’s newest version of Live Producer Design.
Begin on Facebook’s “Home” page. (Click the house icon at the top of the screen.)
Click the red camera icon next to “Live Video.”
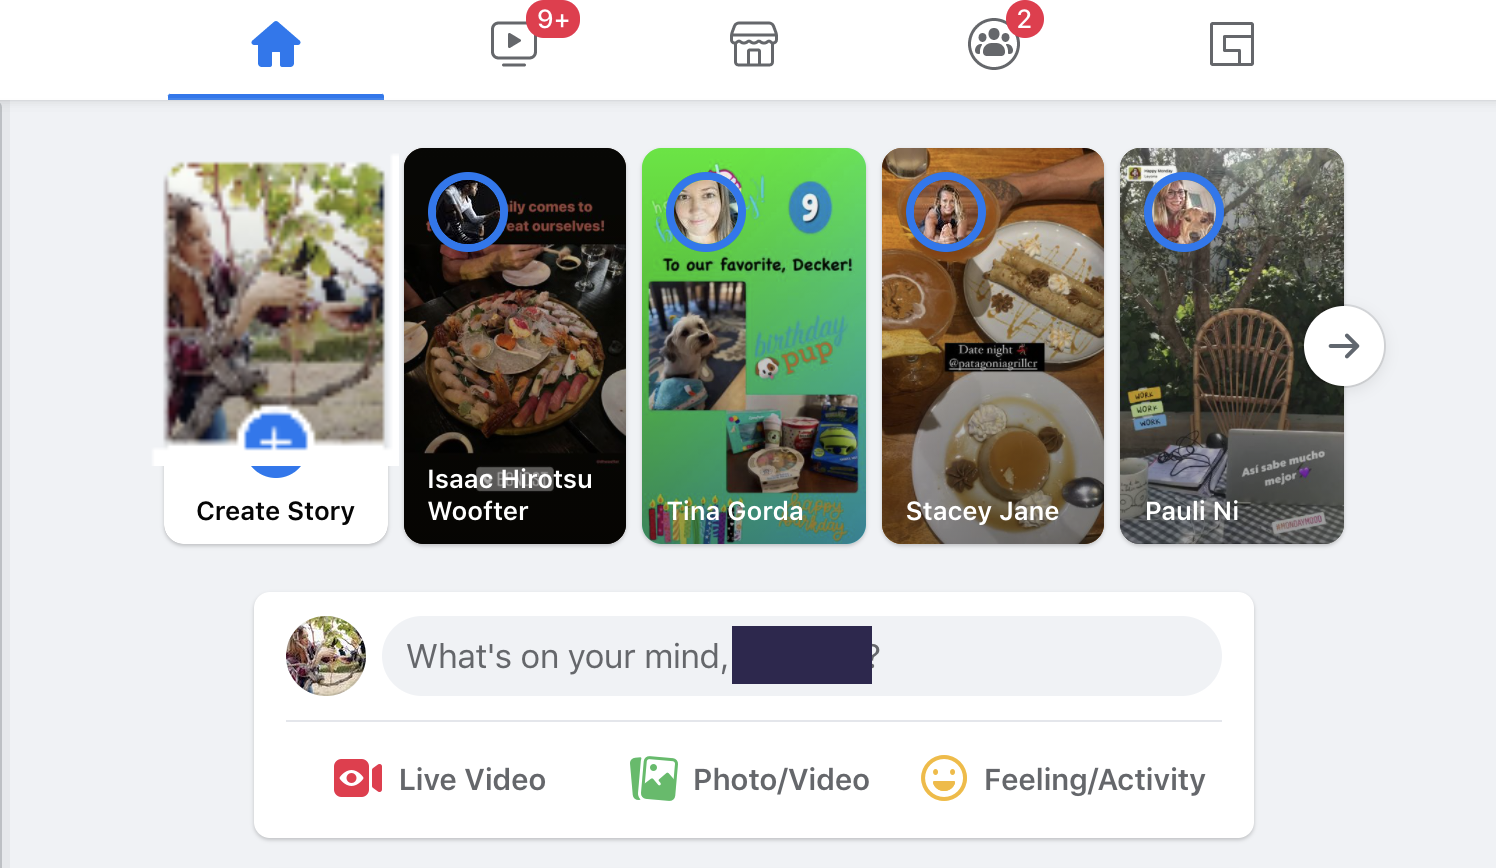
Click on “Live Video” in your newsfeed
You have two options: “Go live” or “Create live video event.” In the left-hand box, click on the button that says “Set Up Live Video.”
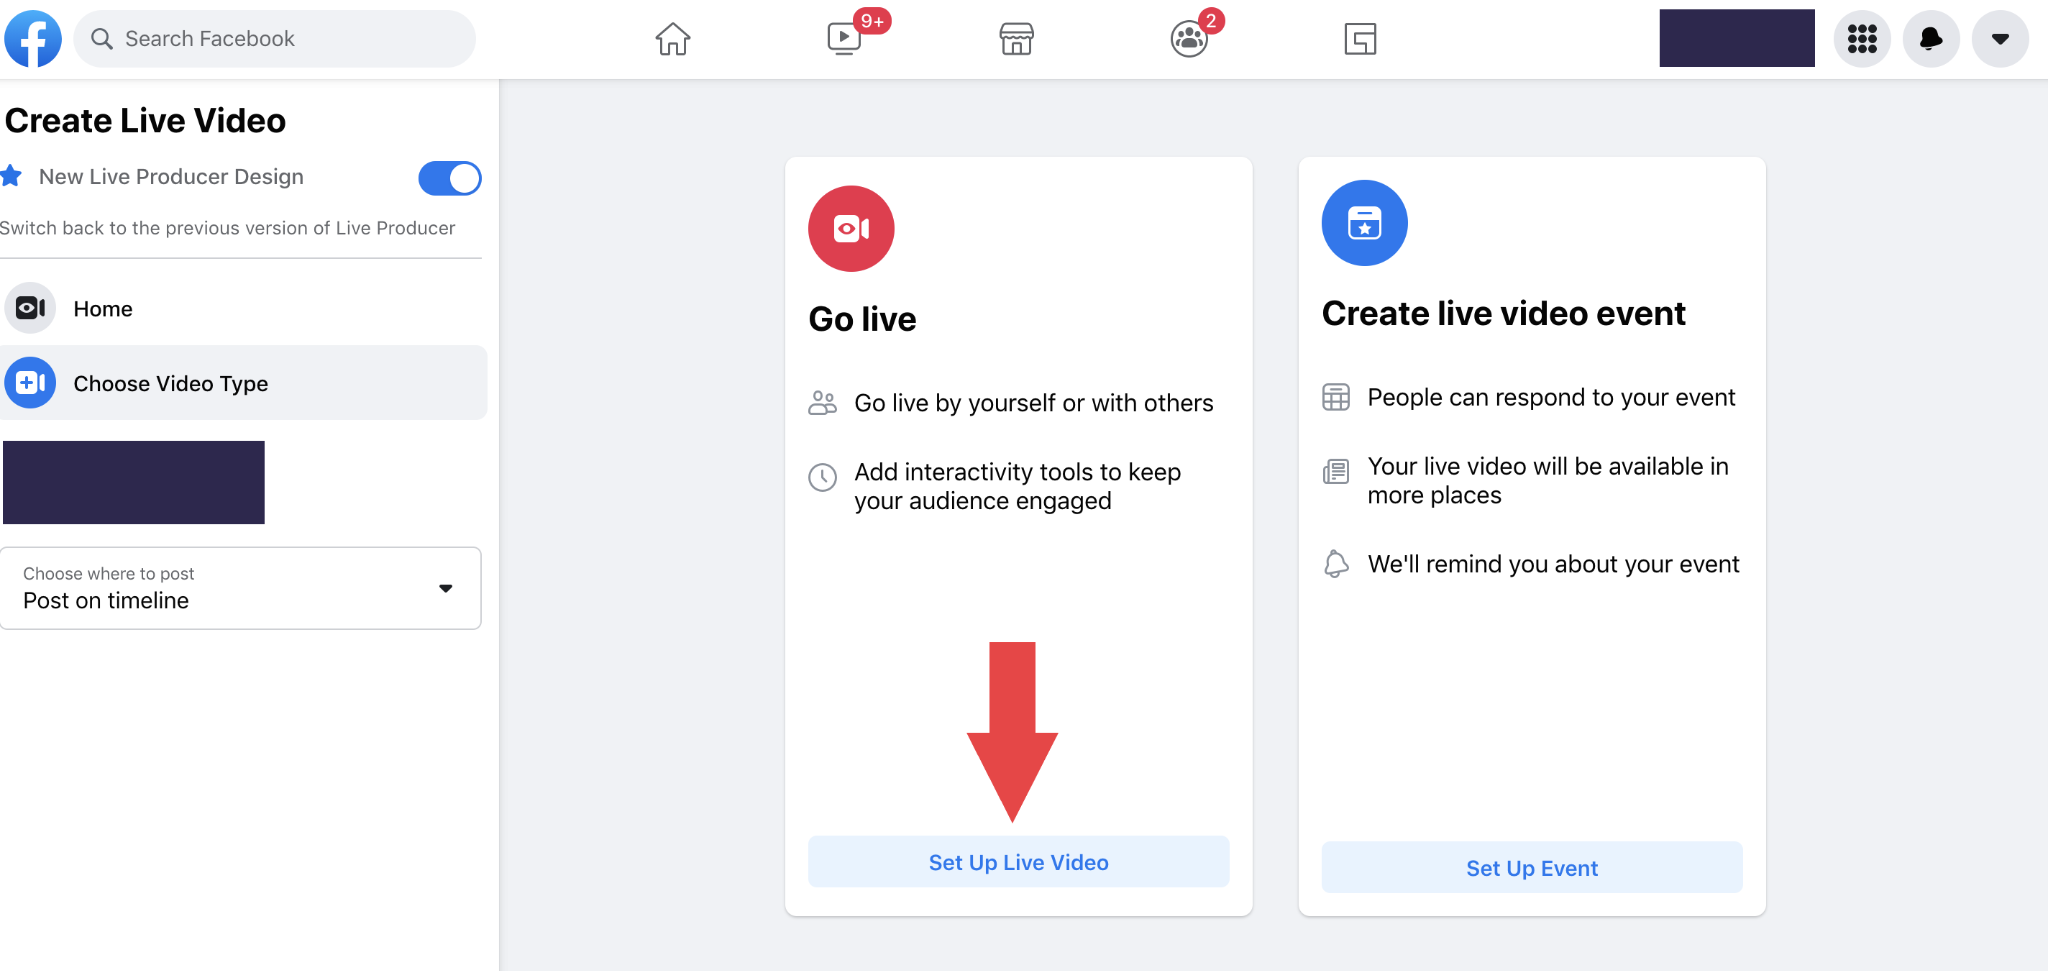
Click or tap “Set Up Live Video”
Facebook automatically sets your video to post on your personal page, but you also have the option to publish your session on a page you manage or a group page. To select this, click “Choose where to post” on the left of the screen. From the dropdown menu, select if you would like to post from another page or group.
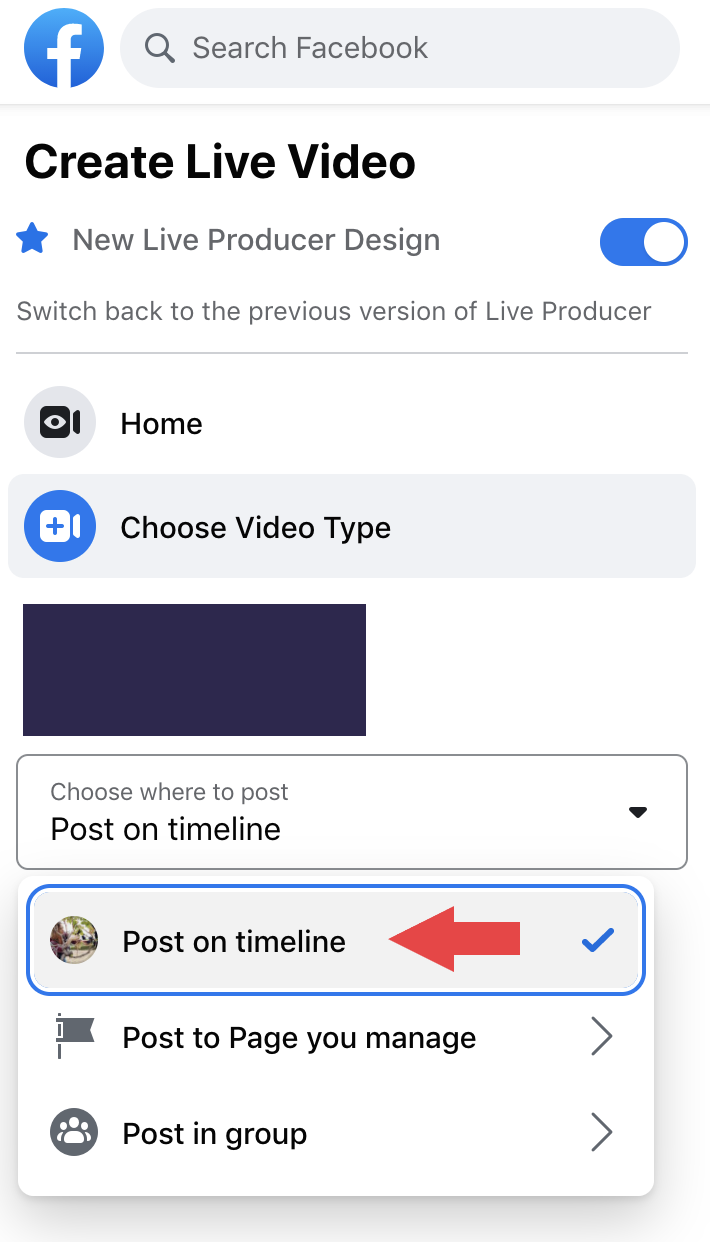
Choose where to publish your live session: your timeline, a page you manage, or in a group
On the left of the screen, notice the “New Live Producer Design” toggle. This is Facebook’s new tool for producing live videos, and the toggle is set to “on.”
You are almost ready to go live! But first, make sure your video’s technical settings and sharing settings are correct. You will learn about each of these in the following sections.
How to complete your Facebook Live stream setup
Before you go live, you must customize some simple settings regarding Facebook Live streams. For example, which camera will you use to record your video? Are your camera and microphone working properly? Where will you publish this video? What is the title of this livestream?
Facebook stream setup (webcam)
Choose your computer’s webcam as your video source.
Add live video details such as your video’s title and description.
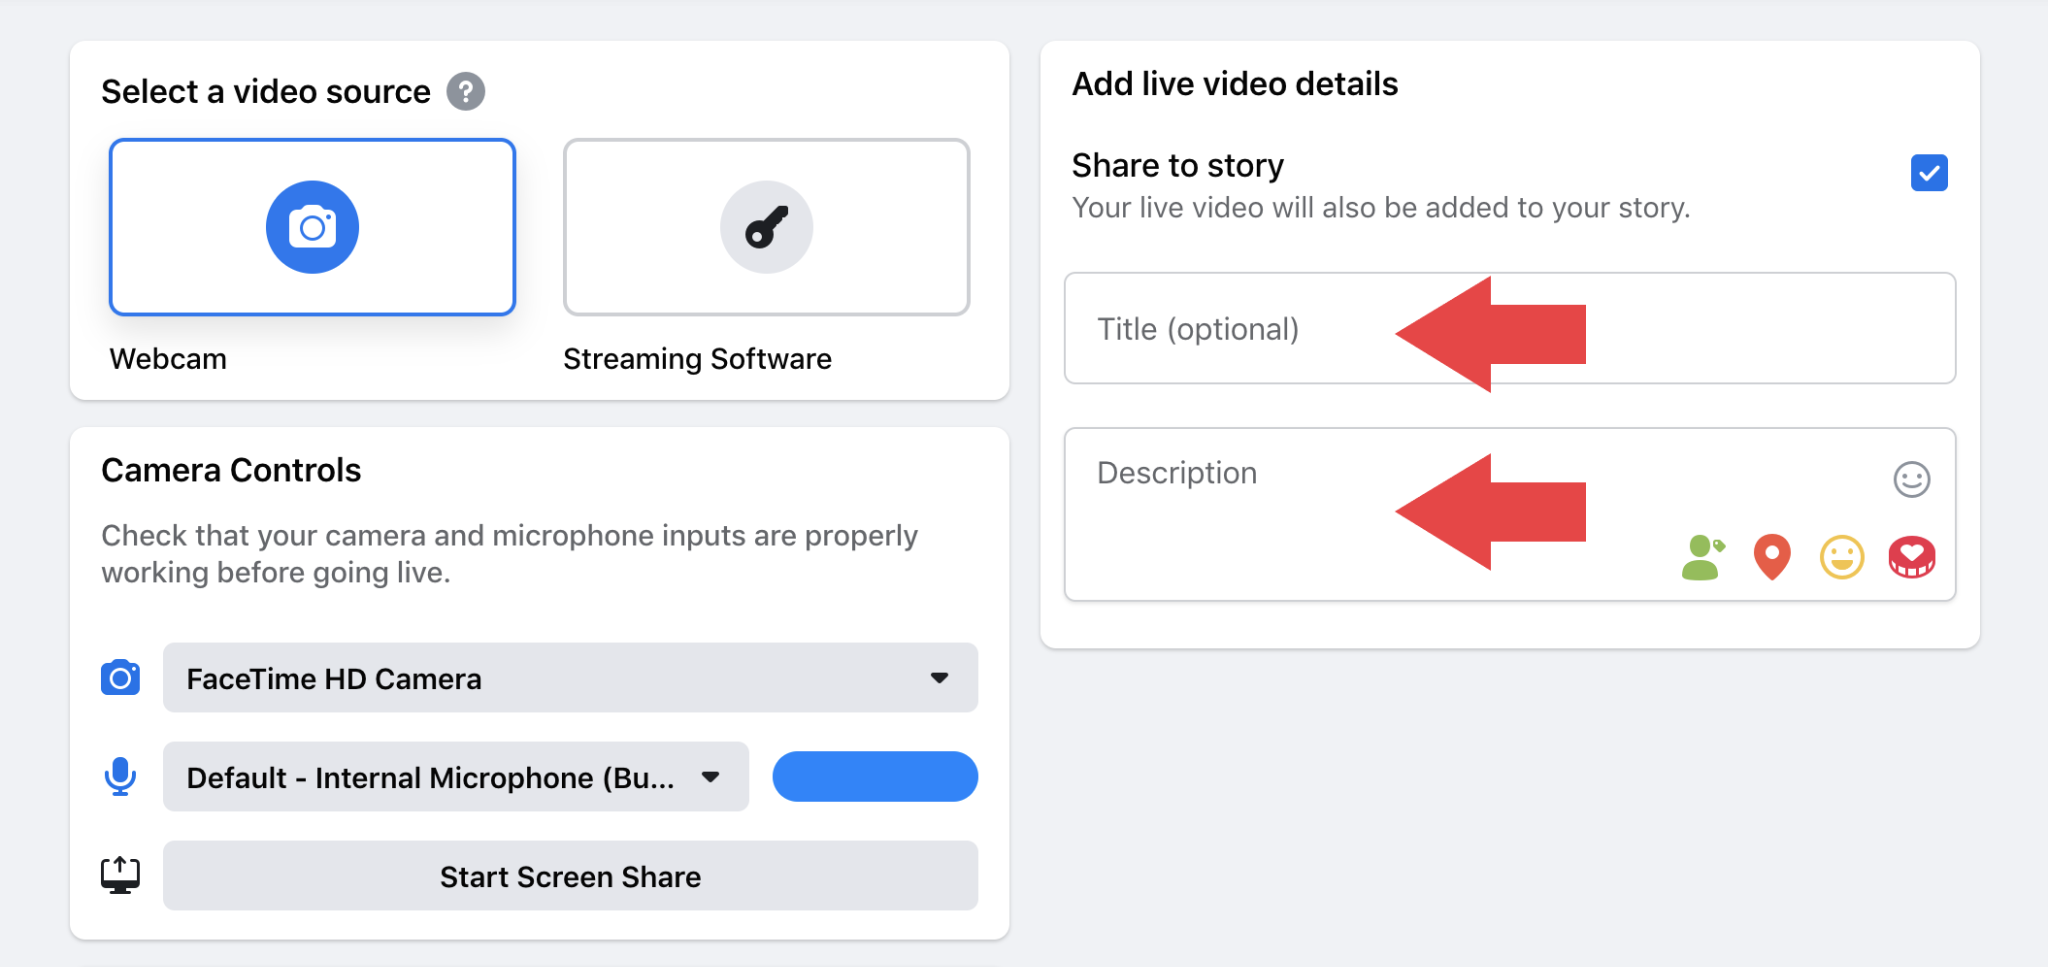
Enter live video details, such as the title and description
The default settings will also publish your live event as a Facebook Story. If you do not want your video to also broadcast to your Facebook Story, uncheck the small blue box that says “Share to story” under “Add live video details.”
Test your camera and microphone settings under “Camera controls.”
Facebook stream setup (streaming software)
Facebook allows users to connect live streaming software to Facebook Live. If you prefer to use streaming software, follow these steps:
Complete the set-up steps listed above.
Under “Select a video source,” click on “Streaming Software.”
Enter the stream key that your software provides.

Choose the “Streaming Software” video source and enter the software’s stream key
Click on “Advanced settings” to choose if this is a one-time or recurring key to use for streaming. Toggle “Persistent Stream Key” if you would like to reuse this key.
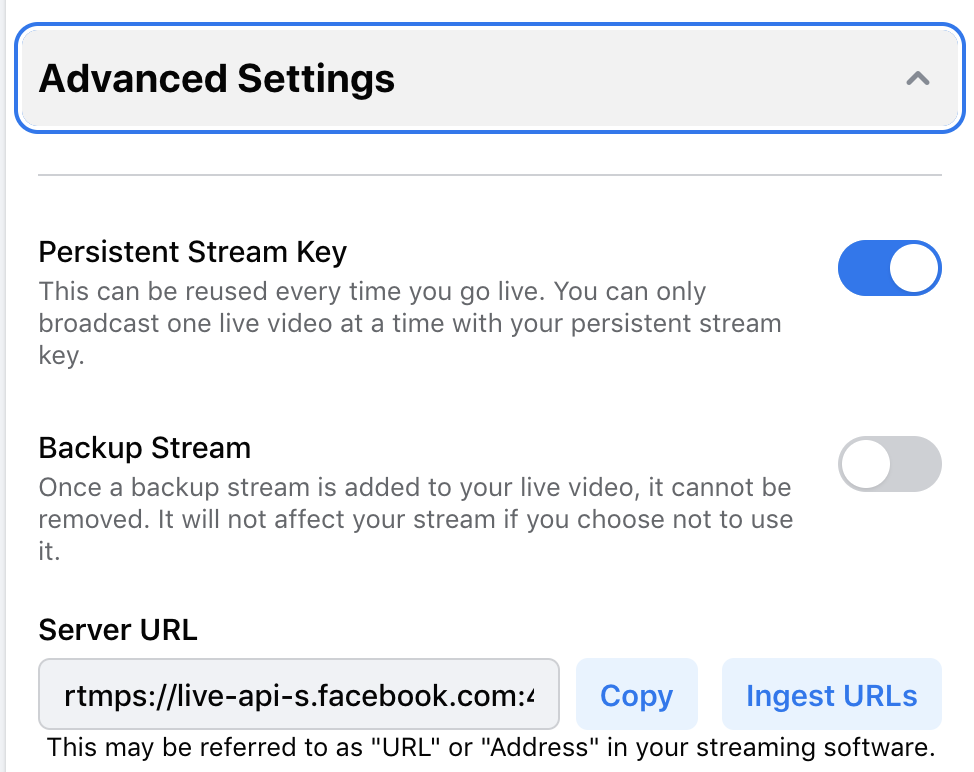
Use “Advanced Settings” to use the same key for each future live session
How to adjust your Facebook Live stream, viewer, and interactivity settings
Facebook allows for customization regarding the video quality, publishing locations, and viewer options such as closed captioning. Find these under “Settings” on the left side of the screen.
The Settings tab provides access to controls for viewer and streaming settings
Stream settings
Under “Settings,” click “Stream.” From here, toggle to turn the following options on or off:
If the live video ends when streaming stops.
If you want to broadcast the video in spherical view (180 or 360). (This is optional.)
If you want to unpublish the video after the live broadcast ends.
You can also select your stream latency (the delay between the video’s recording and when it displays to viewers). You can choose between auto (which Facebook recommends), normal, or low-latency.
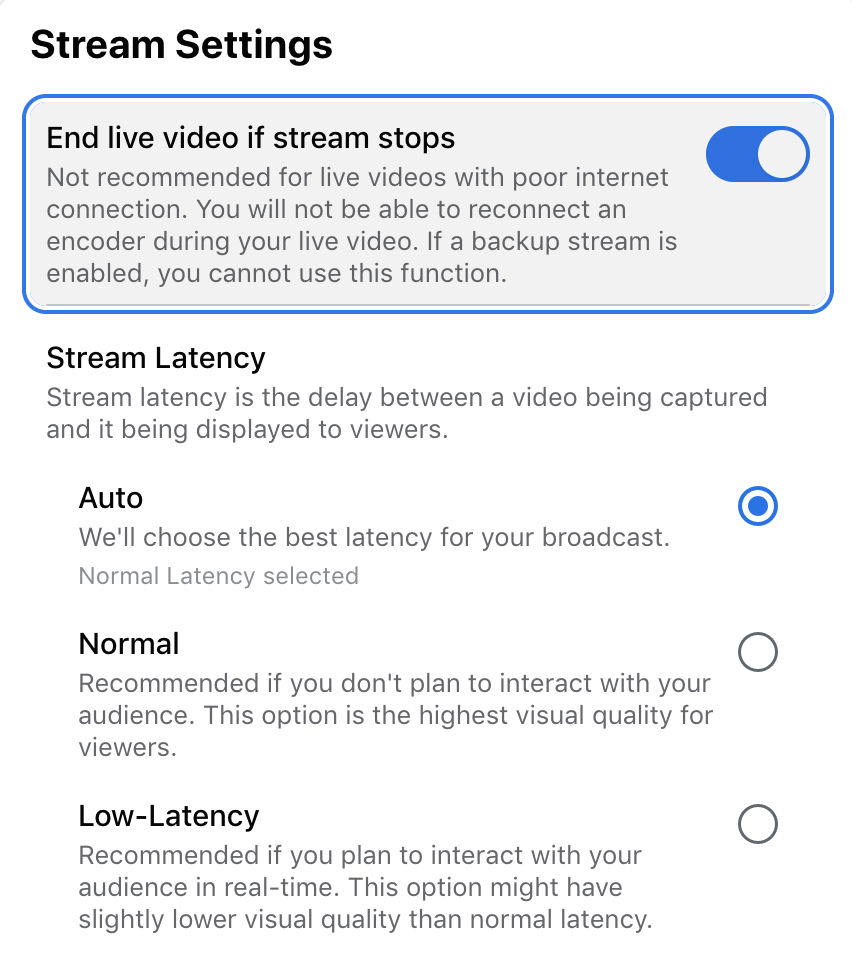
Modify your stream settings and customizations
Viewer settings
Under “Settings,” click “Viewer.” From here, toggle to turn the following options on or off:
Rewind
Auto-generated captions
Direct messaging from viewers
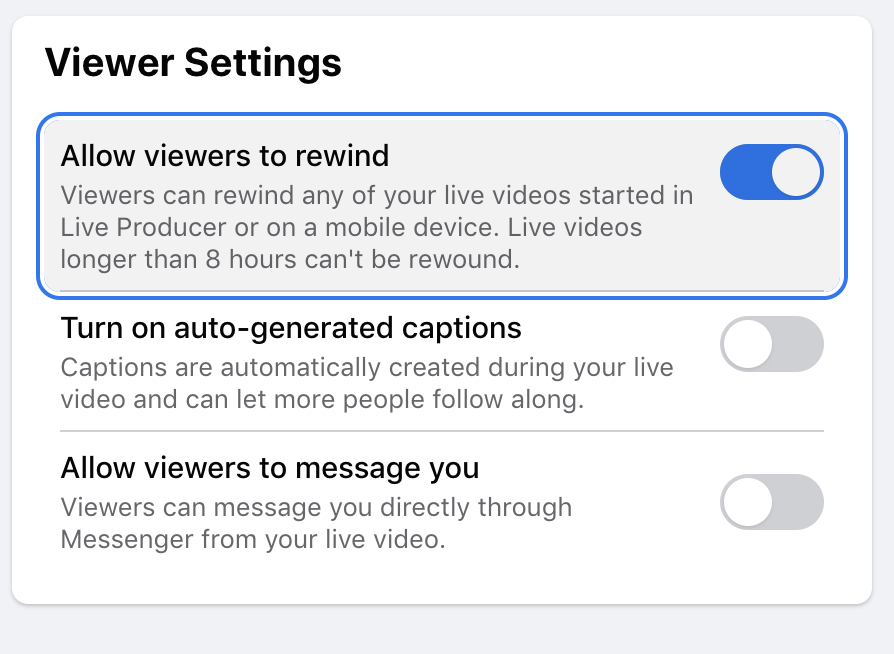
Adjust your viewer settings and customizations.
Interactivity settings
Under “Settings,” click “Interactivity.” From here, can you create the following:
Polls
Questions
Graphics (if you are using streaming software; Facebook does not provide a graphics feature for your computer camera).

Your interactivity settings include polls, questions, and graphics when you go live using streaming software
Now you're ready to go live! From the left side of your screen (under “Create Live Video”), click on “Go Live.” Have fun broadcasting!
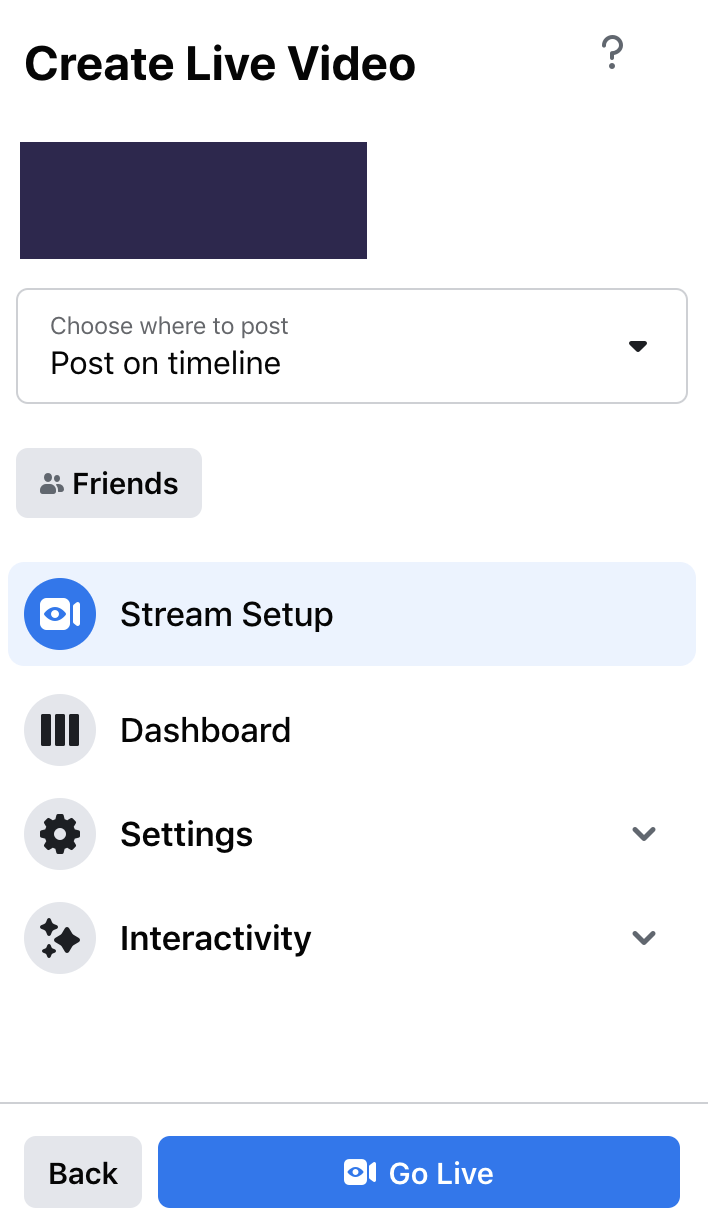
Go live with a simple click of a button
How to enhance your Facebook Live sessions
Would you like to make your Facebook Live sessions even more engaging? Live streaming software offers options such as customized graphics, higher quality broadcasts, and even monetization for your Facebook Live sessions. (And, as you learned in this article, live streaming software is incredibly easy to connect to Facebook Live.)
Check out these incredible live streaming software options to elevate your next Facebook Live.
Disclaimer:
The steps to go live on a Facebook page were researched in September 2021, and screenshots reflect the app layout on a desktop computer. Applications and layouts are liable to change; see Facebook’s Help Center for additional information.