
One of the most important aspects of a high-converting landing page is clear, value-adding content.
When it comes to software landing pages, that content should include screenshots showcasing your software's interface or unique features. Buyers want to see what software actually looks like before giving away their valuable contact information in exchange for a trial or demo.
Rather than simply pasting screen captures onto your landing page, there are many different ways to showcase your software while adding visual interest to your landing page design. Adding shadows, displaying screenshots on a device, or calling out key features are great ways to attract users' attention.
You might think that creating professional-looking images requires photo expertise and complex editing software, but it's actually remarkably easy to get great results with software that's likely already on your computer.
Below, I'll show you several ways to spice up your screenshots using a surprising tool: Microsoft PowerPoint.
Getting started in PowerPoint
We've previously shown that PowerPoint can be used for more than just meetings, but it's probably not the first thing to come to mind when looking for a photo editor.
However, with surprisingly powerful features, PowerPoint can quickly turn a bland image into one that will capture buyers' attention, making it a great tool for creating professional-looking screenshots to use on your landing pages.
For this tutorial I'll be using PowerPoint 2013, so if you're using a different version your layout and menu choices might be a little different, but the functionality should be the same.
Before we get started, here are a few basic techniques that will allow us to edit our images:
Most of the tools we'll be using can be found on the "Format Picture" menu within PowerPoint:
To access these tools, insert an image then right-click on it and select "Format Picture" from the bottom of the list, then click over to the "Effects" tab on the format menu that appears on the right-hand side of the screen.
PowerPoint allows you to combine multiple elements, including images, text, lines, arrows, and more, into one unified image that you can save:
Shift-click on each element to select them, then right-click and select "Group" to combine them into one image.
Once you are done editing your image, you'll need to save it so that you can use it on your landing page.
Right-click on your finalized image and select "Save as Picture," then save the image to your desktop for use. Use the PNG file type to preserve transparency in the image's background.
Below, I'll show you five specific ways you can use PowerPoint to improve your screenshots.
1. Shadows
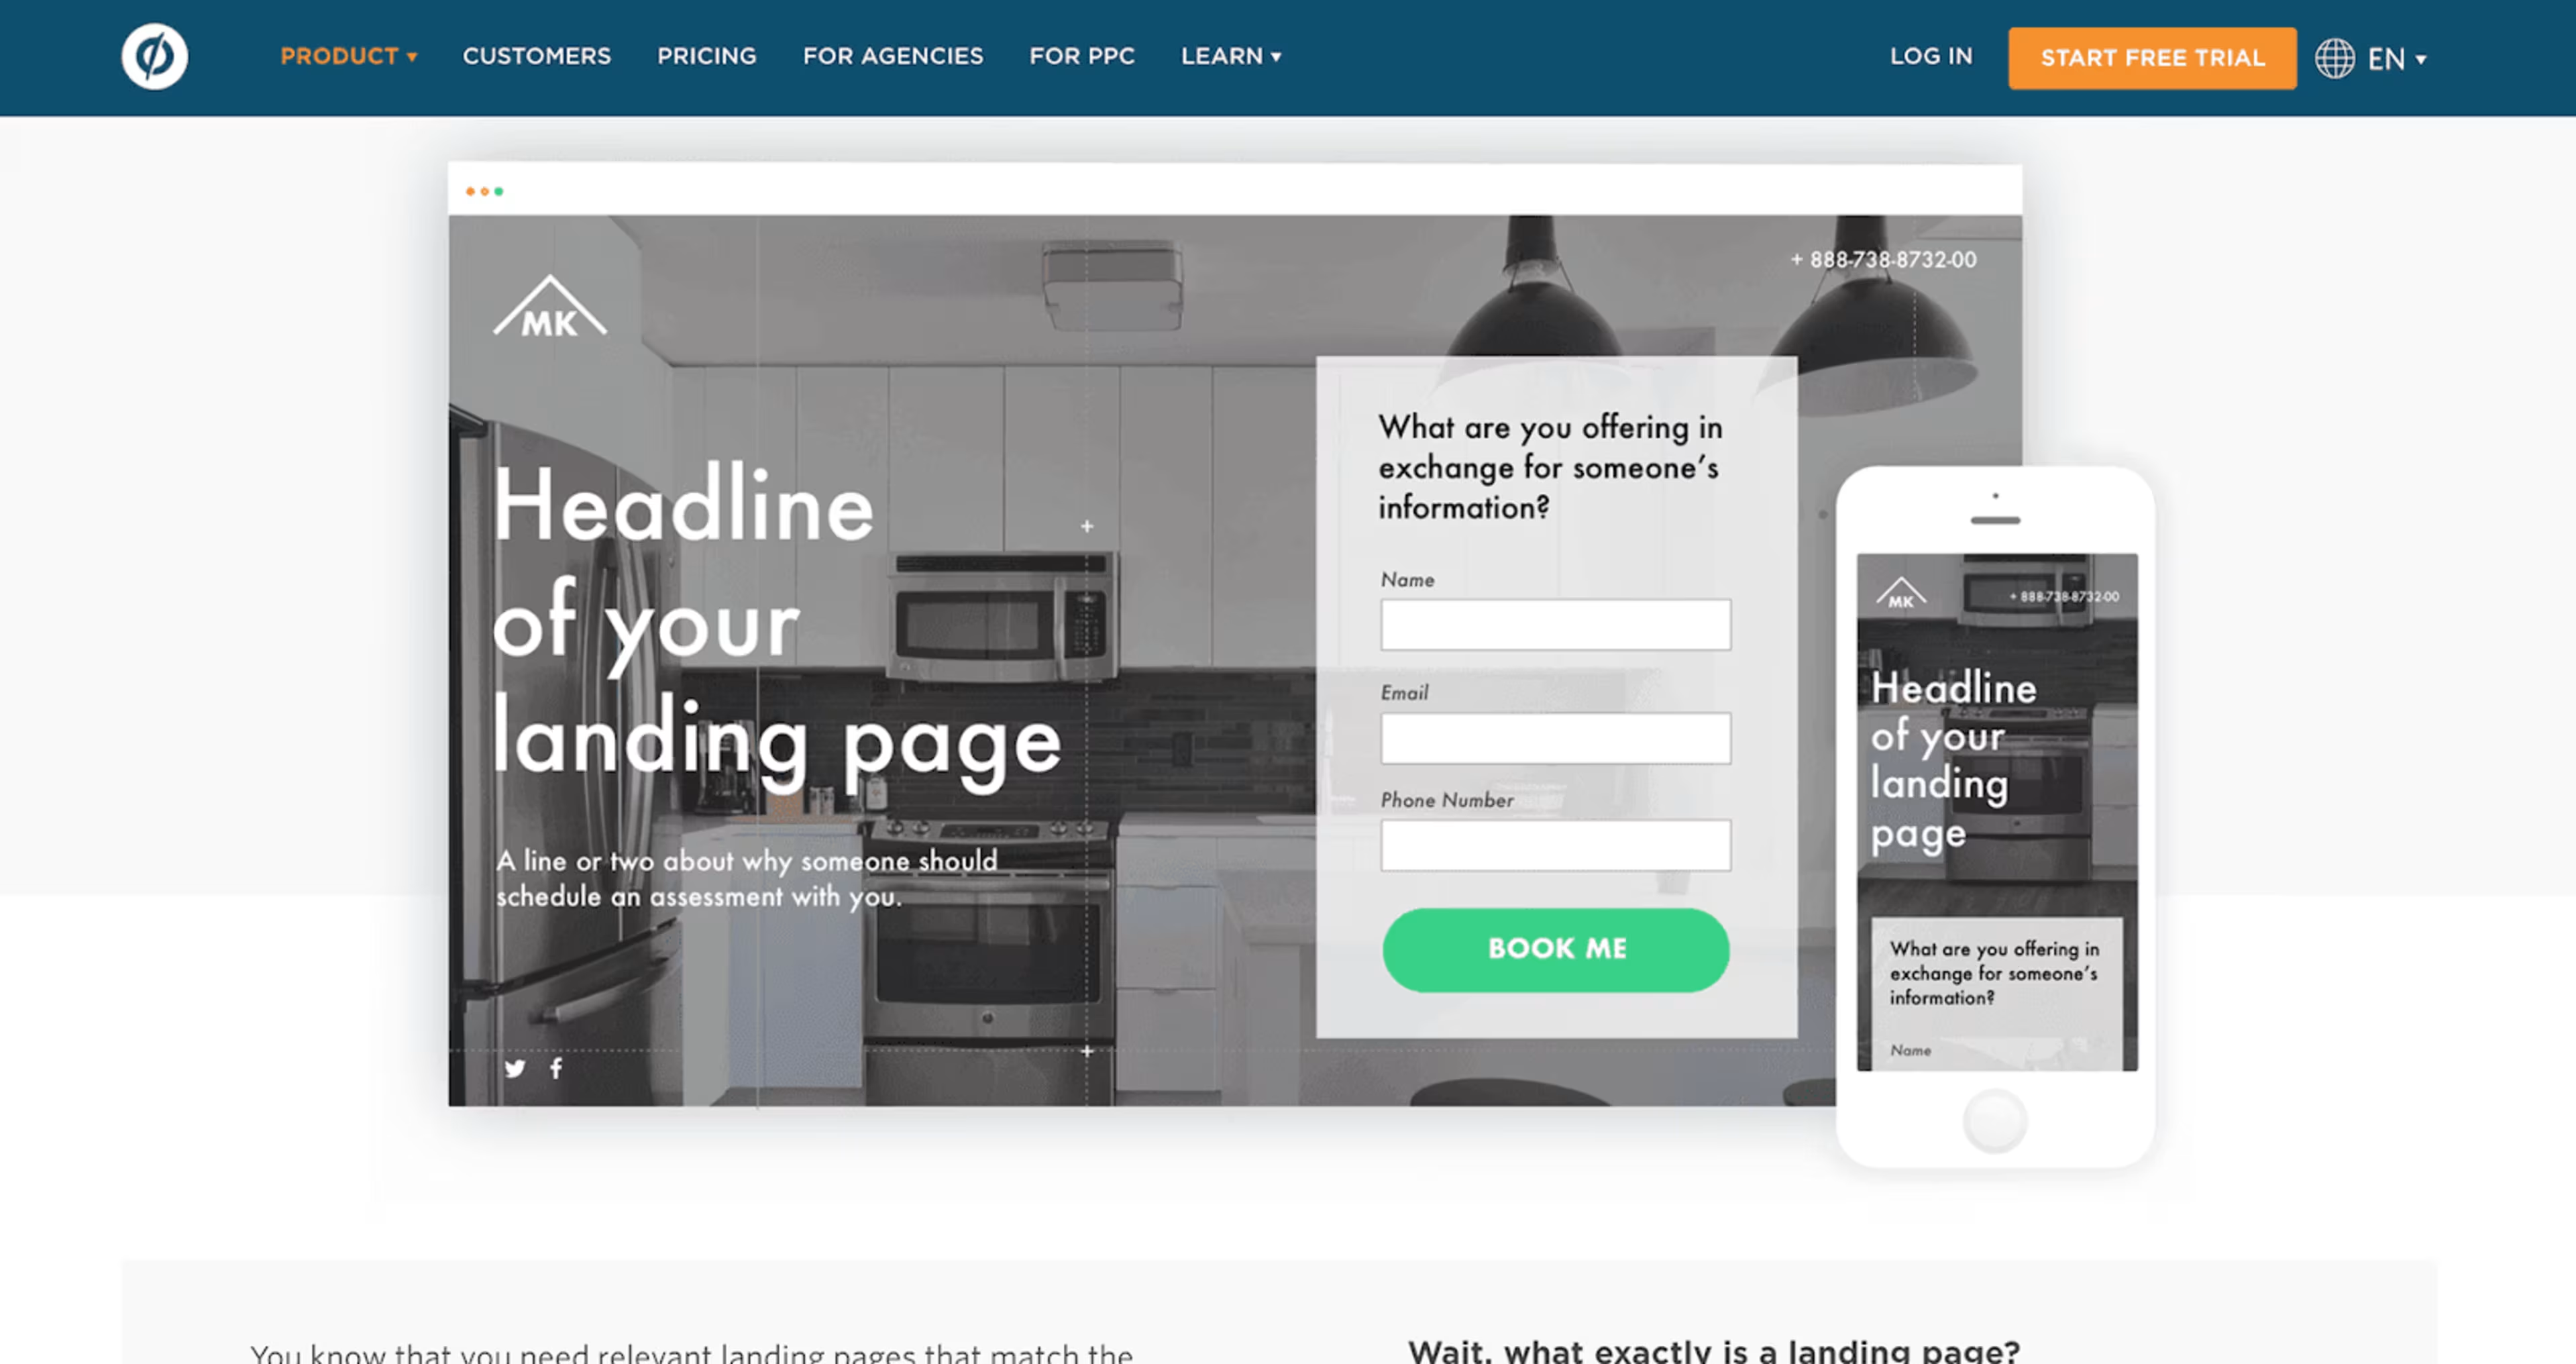
Unbounce uses shadows to make screenshots stand out
One of the easiest ways to dress up a screenshot is to add dimension with a shadow. Rather than sitting flat on the page, the image will pop out from the background due the the illusion of depth.
How to: Shadows can be added to any image with just a few clicks, and can be used as a finishing touch in combination with many of the other techniques presented below.
From the effects menu, click on "Shadow" to access the drop-down menu. Select a preset shadow, then use the sliders to tweak the size, position, color, and transparency of the shadow to your liking.

How to add shadows to an image in PowerPoint
Quick tip: Use the "Offset Center'"preset with 80% transparency and 101% size for a simple shadow that looks good in almost every application.
2. 3D rotation
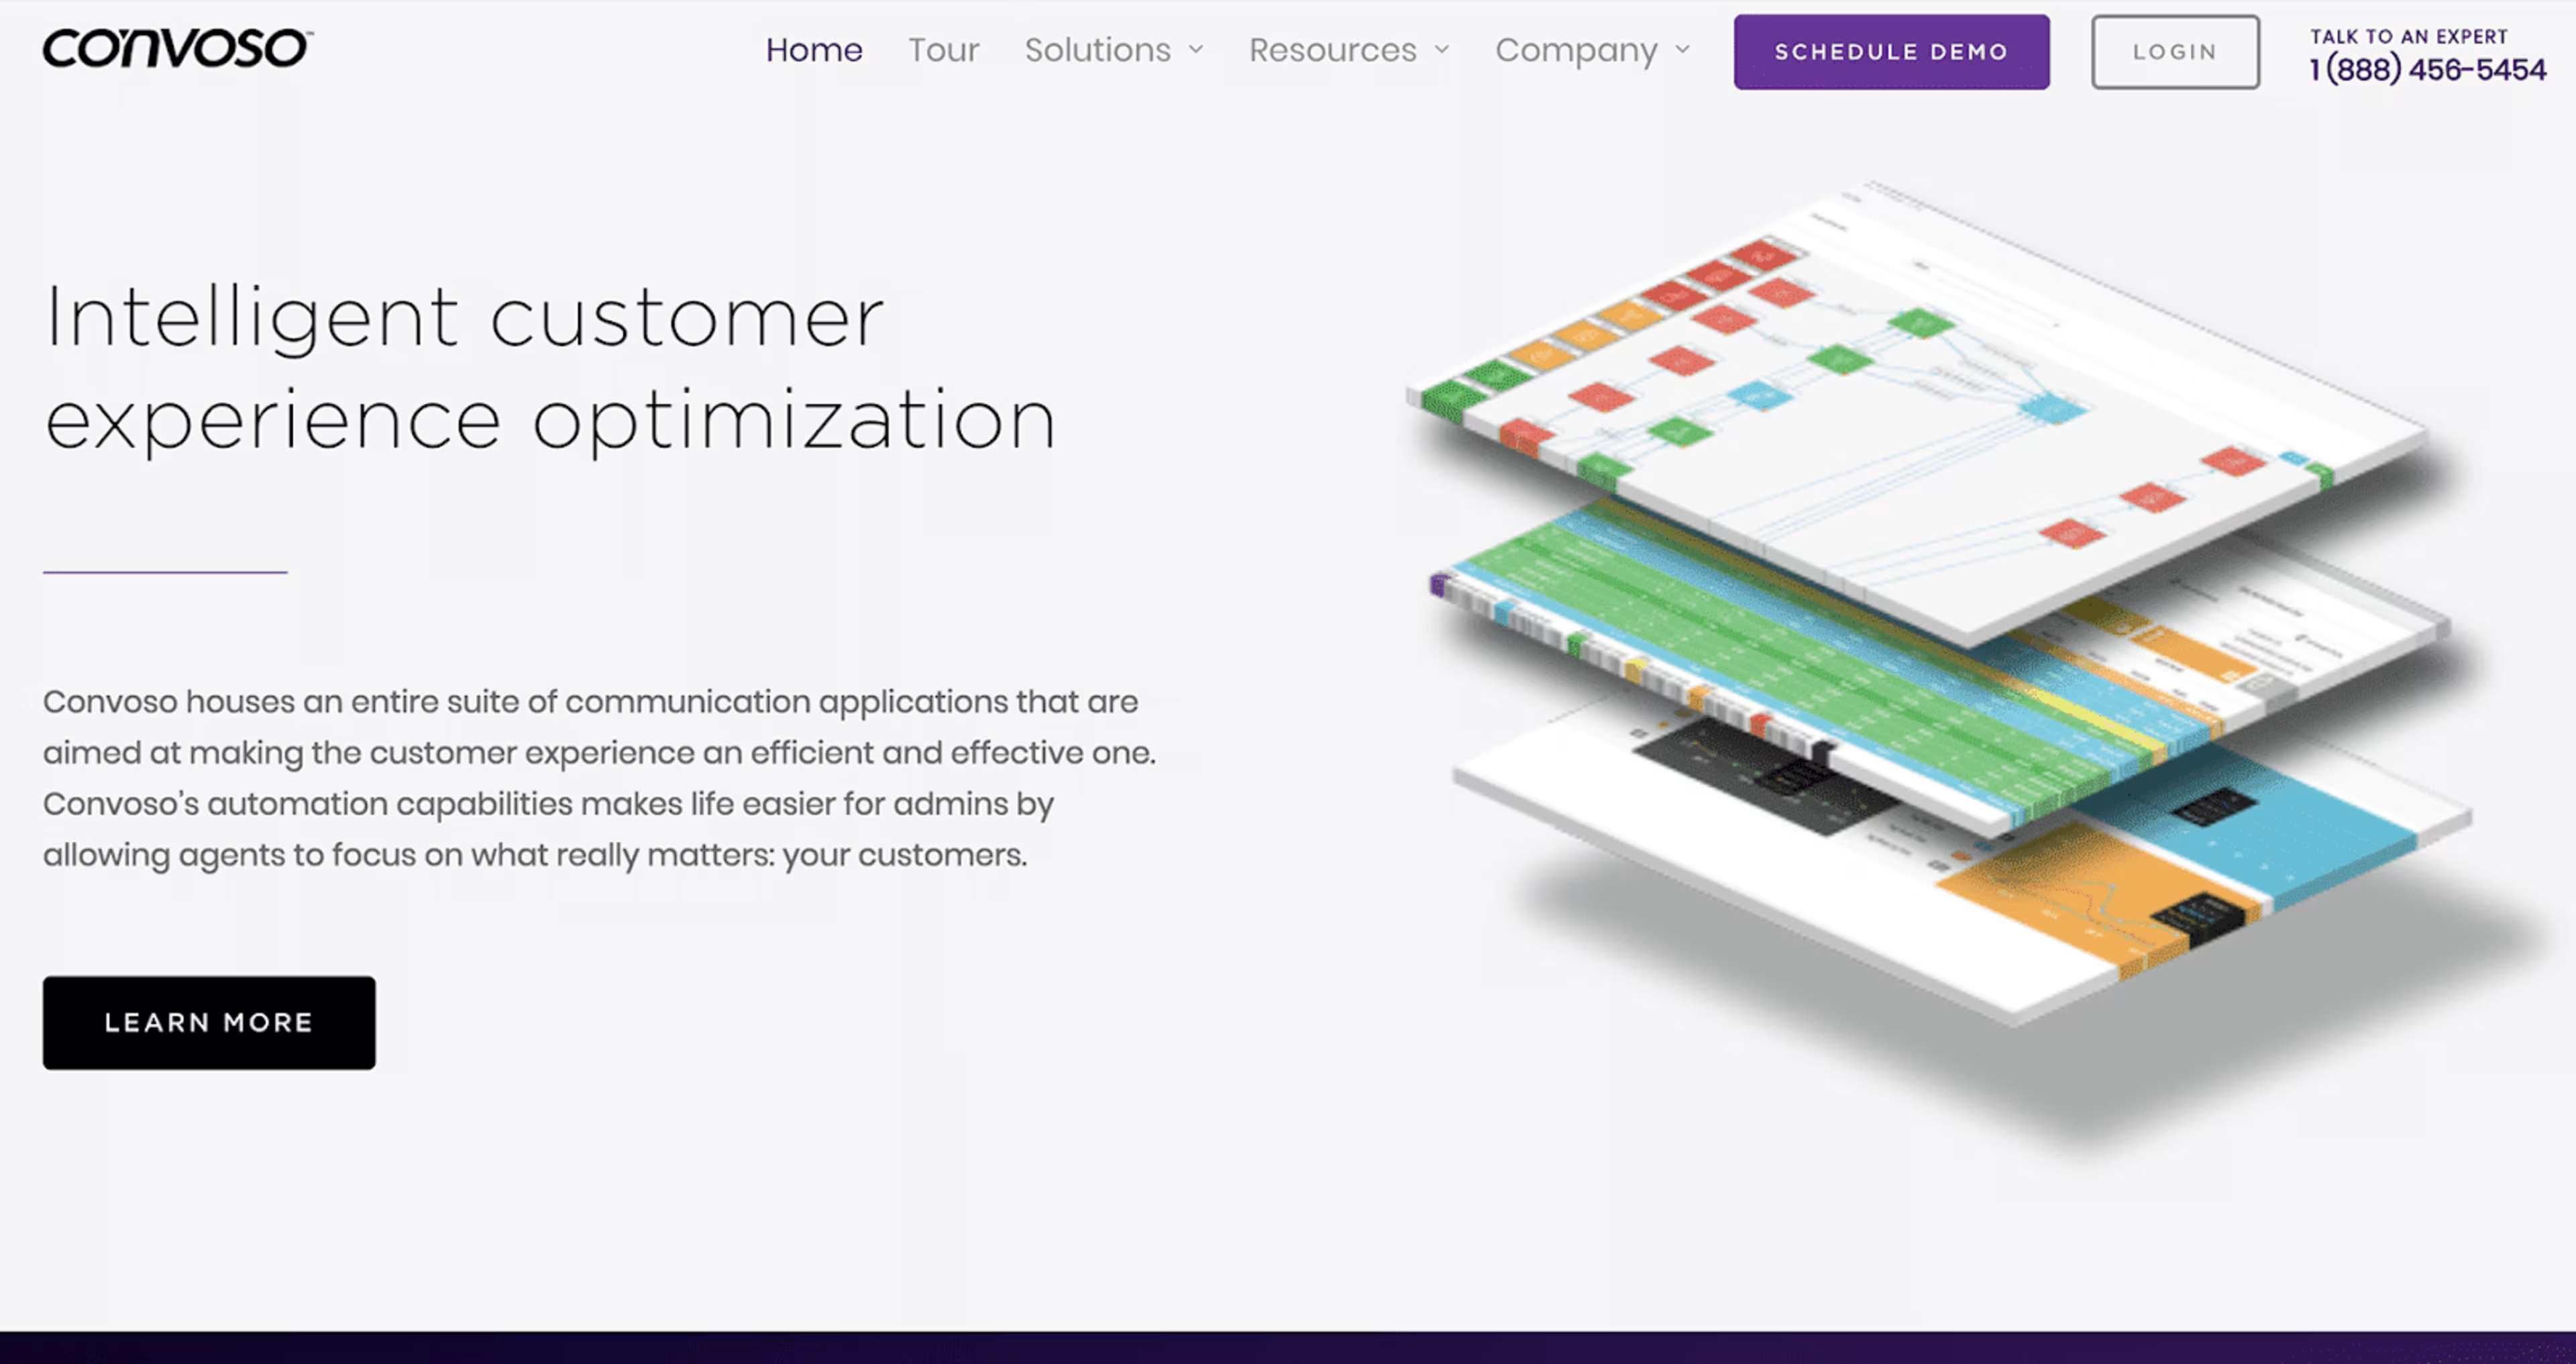
Convoso's stacked, rotated screenshots look like they occupy physical space rather than sitting flat on a screen
PowerPoint allows you to rotate photos in space, adding depth and visual interest to your images.
This tool can be used to match the angle of a screen in a stock photo, allowing you to place screenshots of your software into professional-looking images (more on this below). However my favorite use of the 3D rotation tool is to create a stacked effect with multiple screenshots.
How to: To accomplish this, apply the same rotation to several screenshots, then arrange them on top of one another. Adding shadows and 3D depth to each image will help visually separate them.
Select the "3D Rotation" drop-down and apply a preset to get started. I usually stick to the "Parallel" section as these are the most useful for matching stock photo screens and creating fun effects.
Adjust the X, Y, and Z rotation settings to rotate the image in 3D space.
To add the illusion of thickness, select the "3D Format" drop-down and use the "Depth" option. This makes them look like blocks rather than paper-thin.
How to use PowerPoint to rotate your screenshots and create a stacked effect
Quick tip: Apply the "Isometric Top Up" preset to several screenshots, with 300° X, 320° Y, and 70° Z rotation. Arrange the images so that they overlap slightly, then apply shadows and depth individually.
3. Device screenshots

Using screenshots on devices, like this example from Polymail, can help buyers better understand your software's versatility
This effect will require a few techniques, including 3D rotation, as well as multiple images to start. You'll need your screenshot as well as a stock photo of a laptop, tablet, or smartphone. When choosing a stock image be sure to check the license to ensure that it is royalty-free and approved for commercial use. If possible, try to find head-on images with plain or transparent backgrounds as this makes the process much easier.
How to: Insert both your screenshot and the stock photo into PowerPoint and align the images. Once it looks like your screenshot is on the device, combine the images by grouping them together.
If you want your final image to be just your screenshot on a device, without any background, you may need to use PowerPoint's "Remove Background" tool on your stock photo. This tool is found under "Picture Tools" on the main Ribbon menu, and allows you to draw lines over your stock photo to select areas of the picture to remove. I recommend zooming in and taking your time, going back and forth with removing and keeping areas until you are satisfied.
If the stock photo is covering up your screenshot, you can right-click it and select "Send to Back" to reorder the images.
Resize your screenshot to fit the device screen on your stock photo. You may need to crop the image if it is not the correct proportion. The crop tool can be found on the "Picture Tools" menu, or under the "Picture" tab of the "Format Picture" menu. With the crop tool, drag from the edge of the image to cut off any extra that does not fit the stock photo.
If necessary, you might also need to use the 3D rotate tool to help align the screenshot with the stock photo screen. You'll need to manually adjust the X, Y, and Z rotation until the two images are correctly aligned.
Once the screenshot is properly aligned, shift-click both images then right-click and group them.

How to use PowerPoint to overly your screenshots onto a device image
Quick tip: Working with images taken head-on makes it much easier to place your screenshot correctly. If cropping is necessary, be sure to not cut off important elements of the screenshot.
4. Informational callouts
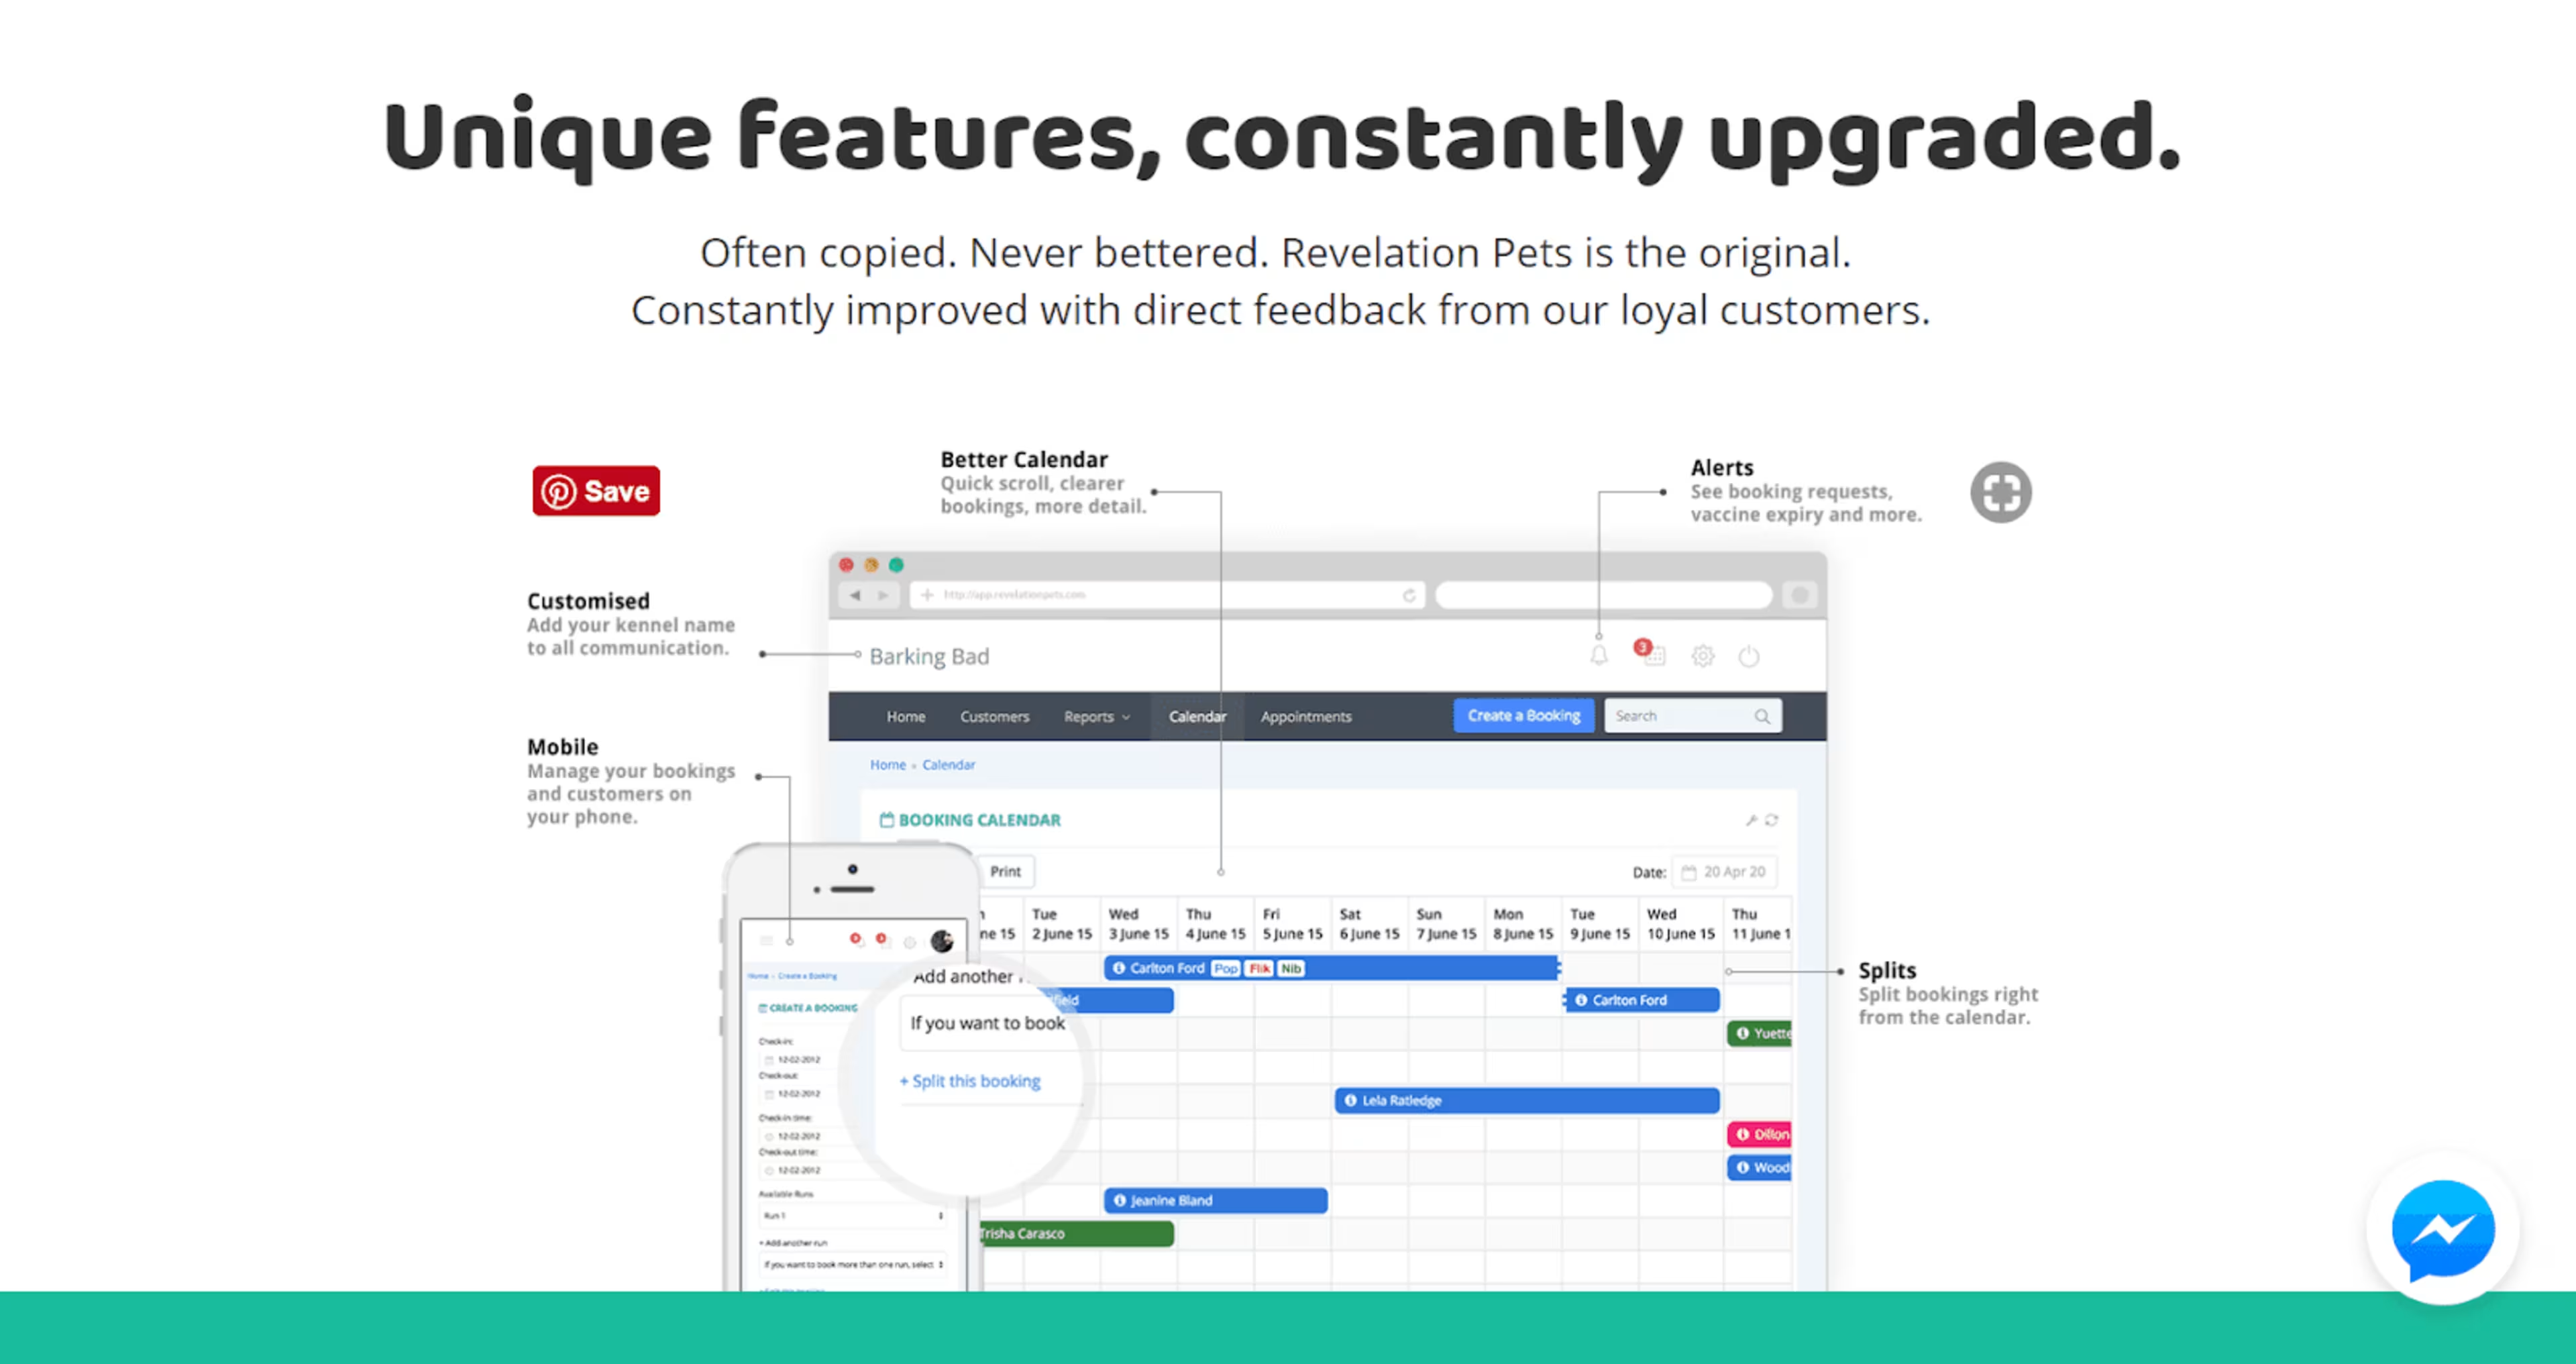
Revelation Pets uses call outs to highlight several key features of their software
A great way to highlight unique features is to literally point to them on your screenshot. PowerPoint has some options for adding lines or arrows to an image, allowing you to label features with ease. For a more polished effect, you can apply this technique to a screenshot you've placed on a device.
How to:
Start by adding the lines or arrows that point to the feature on your screenshot. From the "Insert" menu, select the "Shapes" drop-down to access the various lines and arrows options. Select a line shape, and click and drag from your text box to the feature on your screenshot to create the line. You may need to use several lines for more complex shapes such as right-angle bends.
You can use the "Line" options under the "Format Shape" menu to change the design of your line. Use the "Width" selector to change the thickness of the line, and the arrow options to add, remove, or change the size of the points at the ends each line. You can also change the arrow points to ovals for a cleaner look. Try out different line styles, colors, and thicknesses to find a design that you like.
Finally, add text to label the feature you're highlighting. Select "Insert" then "Text Box" from the menu, then click anywhere on the slide to draw out the text area. Use a font and color that matches your branding. You may also want to include a short description of the feature in a smaller font size underneath.
How to use PowerPoint to highlight features in your landing page screenshot
Quick tip: Hold shift while dragging out your line to ensure that it's straight. To create perfect 90 degree bends, first create individual horizontal and vertical lines and set the "End Type" option of both lines to square. Click and drag one near the end of the other—they will snap together.
5. Magnified callouts
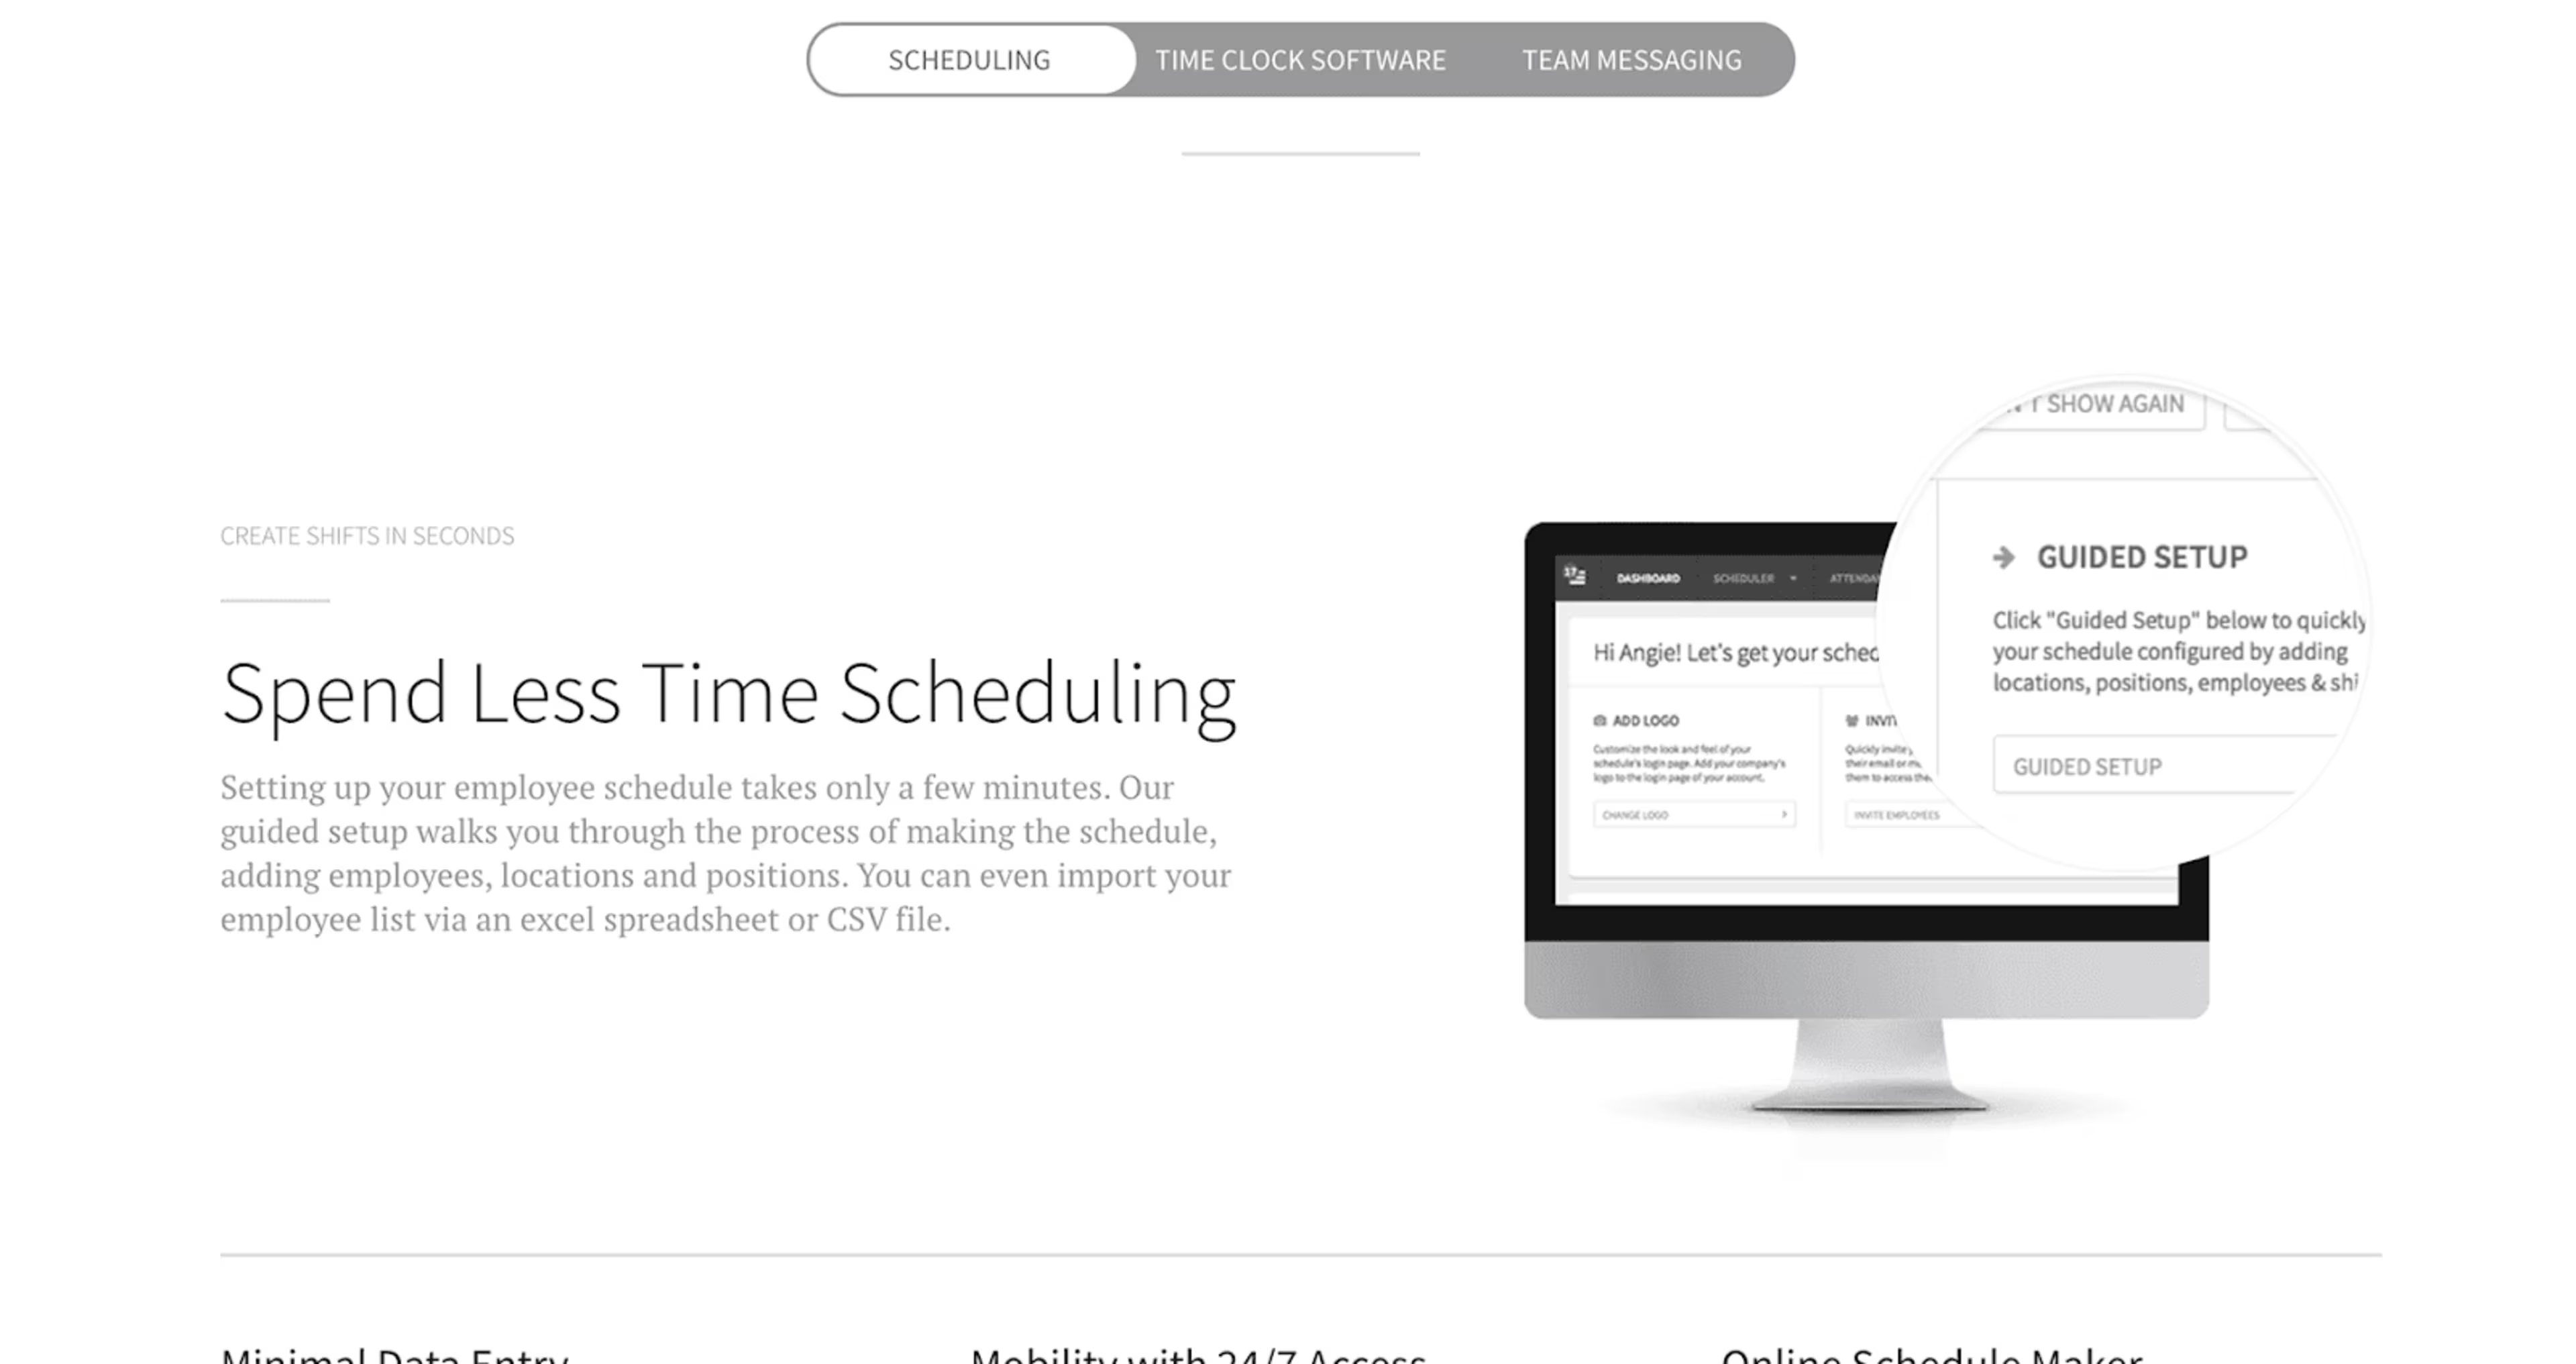
When I Work uses a magnifier to help draw attention to key details on their screenshot
Sometimes screenshots are full of densely packed information and it's difficult to make out the details while keeping an appropriate size. A great way to call attention to these details is to increase the size of just the detailed area, while leaving the rest of the screenshot alone. The effect is like holding a magnifying glass over the important details of your software.
How to: This effect combines techniques from placing your screenshot on a device and adding informational callouts. You'll need to manipulate one copy of your screenshot and place it on top of another before combining the two images.
Insert two copies of your screenshot into PowerPoint. If possible, use a high resolution image for the copy that will be the zoomed-in detail shot.
Select one copy of your screenshot, then go to the "Picture Tools" tab under the main Ribbon menu. Select the drop-down under the crop tool, and choose "Crop to Shape" then "Oval." Next, select the crop drop-down again and choose "Aspect Ratio" then "1:1" to crop to a perfect circle.
Use the dark corner brackets to adjust the size of the crop, then click and drag the image to ensure the placement is centered over the detail you want to highlight. Click off the shape to finalize the crop.
Select the cropped image and add a border using the "Picture Border" option on the "Format" menu to help it stand out against the main screenshot. Change the border weight and color to make the detailed section stand out.
Finally, position the magnified detail section over the screenshot and group the two objects together.
How to use PowerPoint to magnify a certain part of your screenshot
Quick tip: Use a thick gray border around the cropped section to create a classic magnifying lens effect. Make sure that the magnified section is large enough that buyers can make out the details.
Bonus Feature
If you need a way to capture screenshots of your software, look no further than—you guessed it—PowerPoint.
From the main menu, select "Insert," then "Screenshot" to launch the tool. PowerPoint will display a list of each window you have open, then simply select your software application and it will capture that screen and place it onto your PowerPoint slide. You can then edit it directly within PowerPoint.
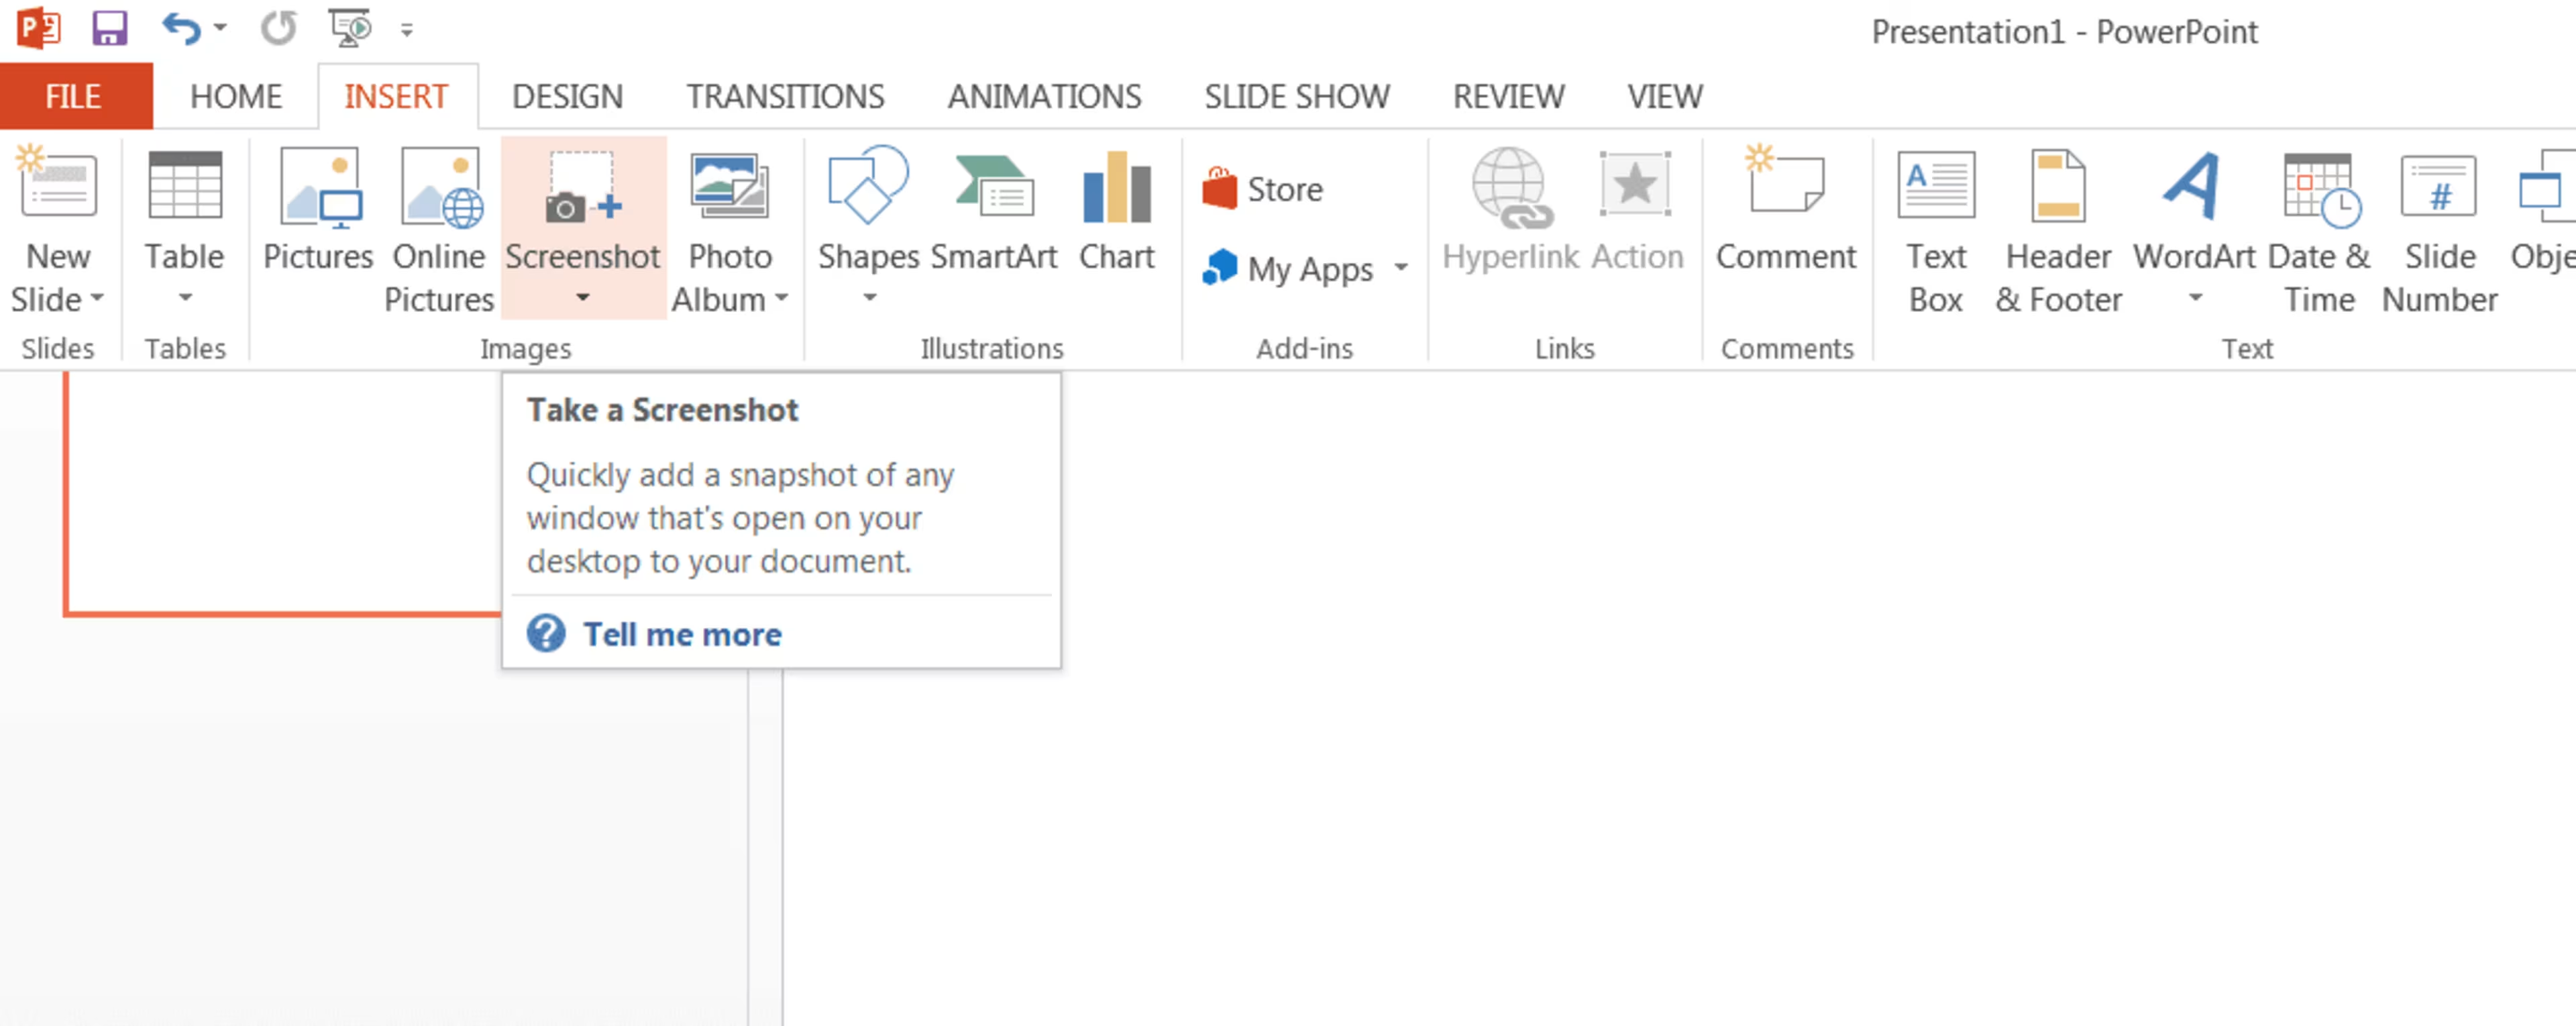
Ensure that you have the software screen you want to capture open before launching the "Screenshot" tool
Time to get started!
There you have it! With these techniques it's possible to turn drab screen grabs into memorable, value adding photos on your landing page. I highly recommend playing with the settings of each tool to get a handle on how they work and what else is possible with them.
Have you discovered any techniques to use common business software in interesting ways? Let me know in the comments below!